
Suzuki 800 Intruder Club & Forum
A UK Site Dedicated To The Suzuki C800, VL800, VX800, M800, VZ800, VS800, C50, M50 Model Intruder / Boulevard / Marauder
|
| | | * Mistress K's adventure in modifying a Suzuki Intruder C50 / C800 * |  |
|
+6bikerdave alfie92 Badger togatony captain crash admin 10 posters | | Author | Message |
|---|
admin
The Final Say!

|  Subject: * Mistress K's adventure in modifying a Suzuki Intruder C50 / C800 * Subject: * Mistress K's adventure in modifying a Suzuki Intruder C50 / C800 *  Sat May 07, 2011 8:01 pm Sat May 07, 2011 8:01 pm | |
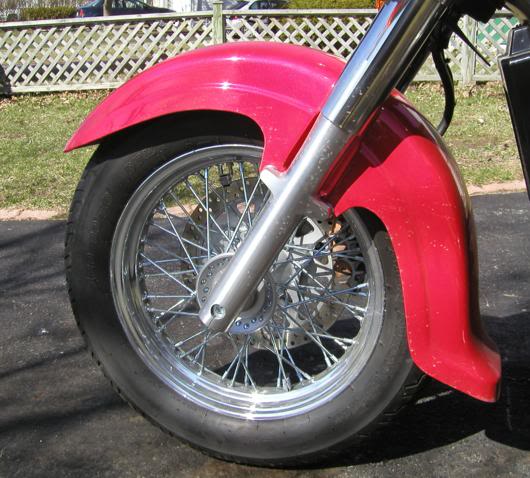
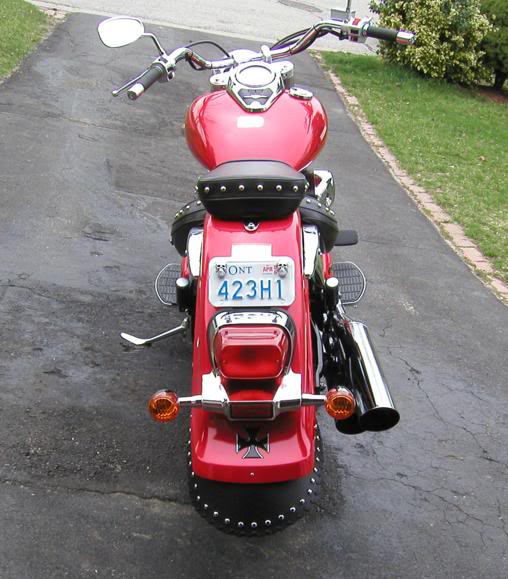
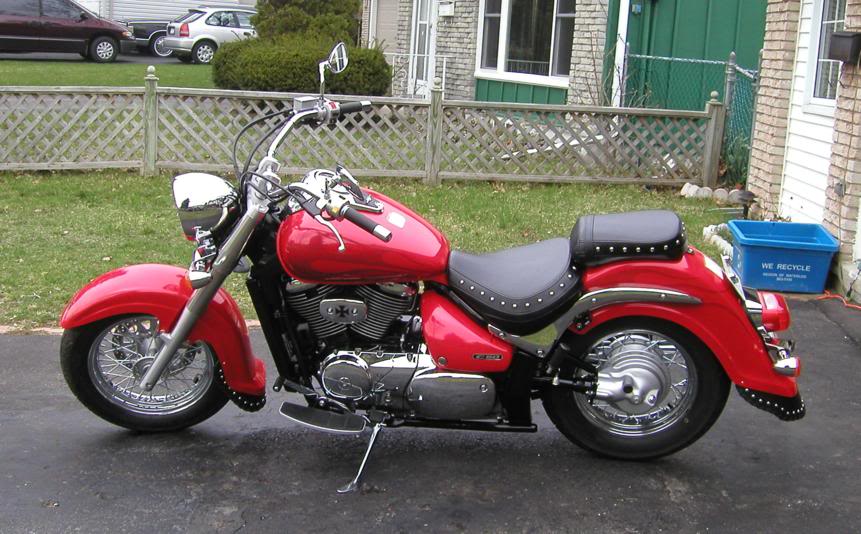
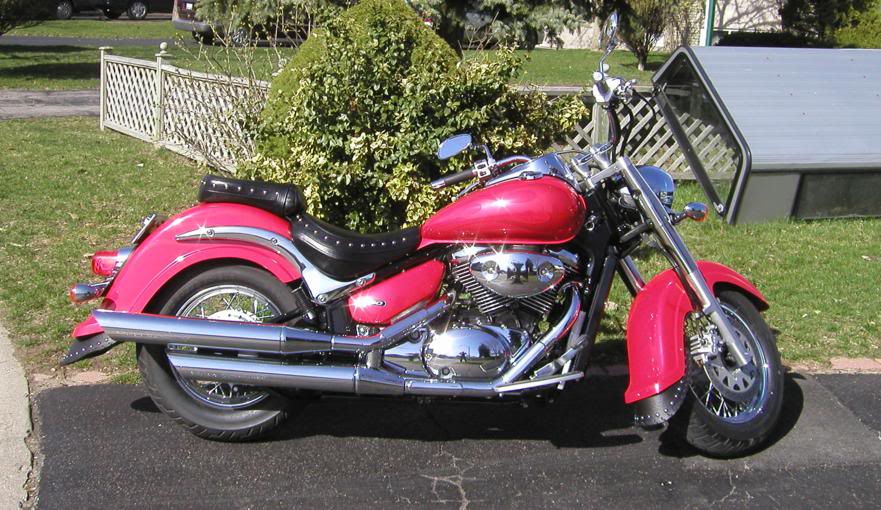
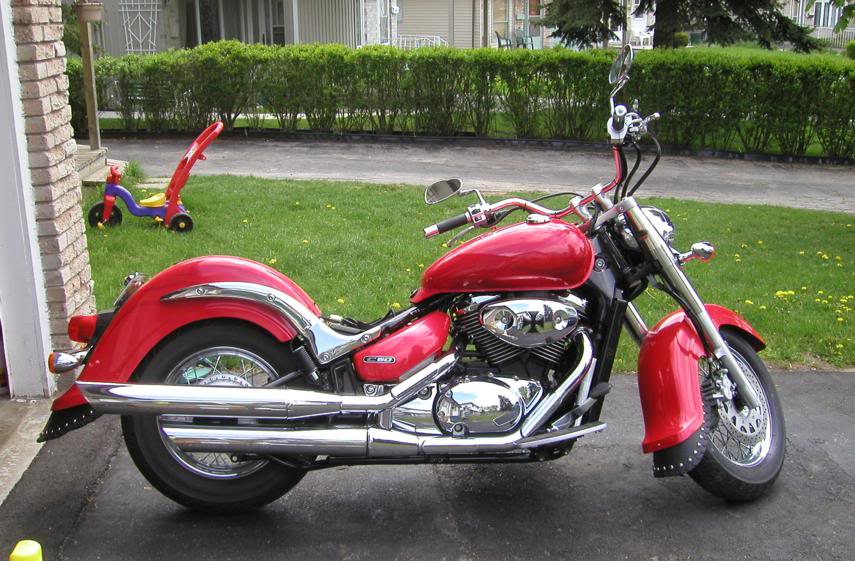
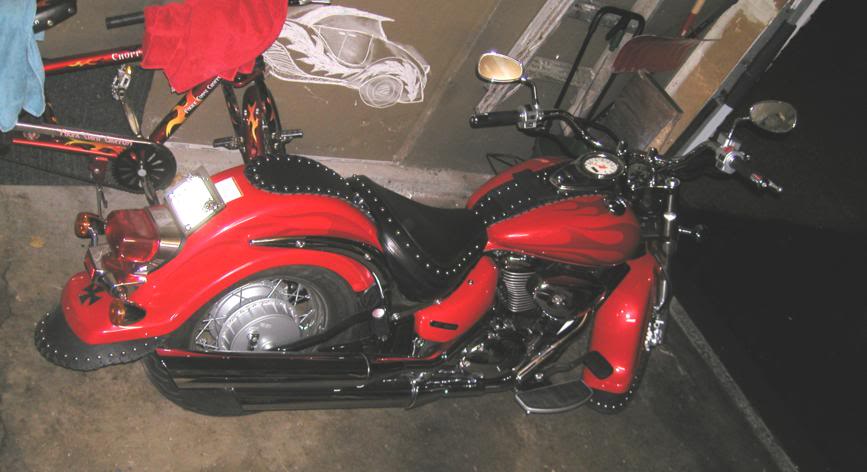
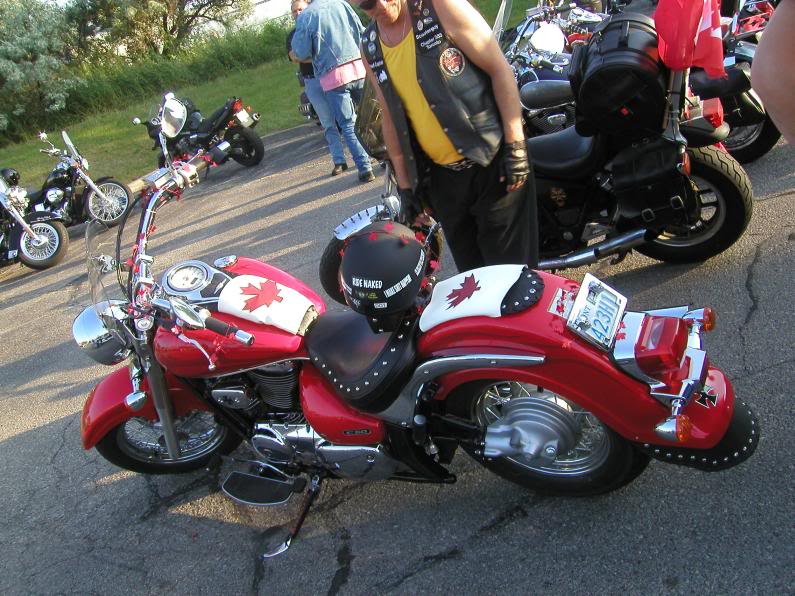
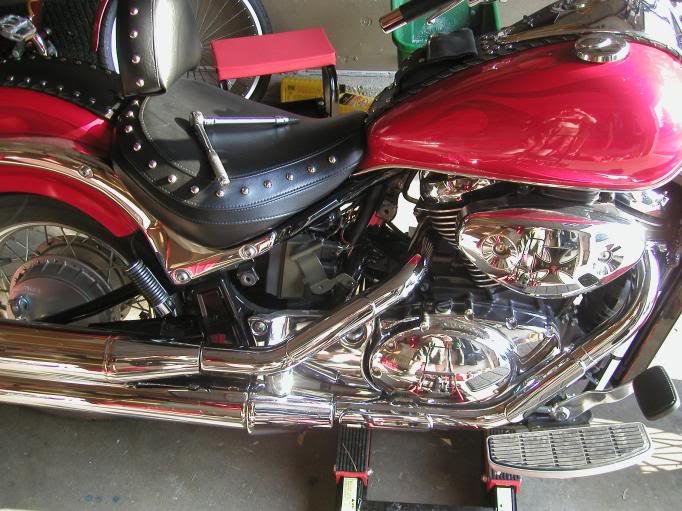
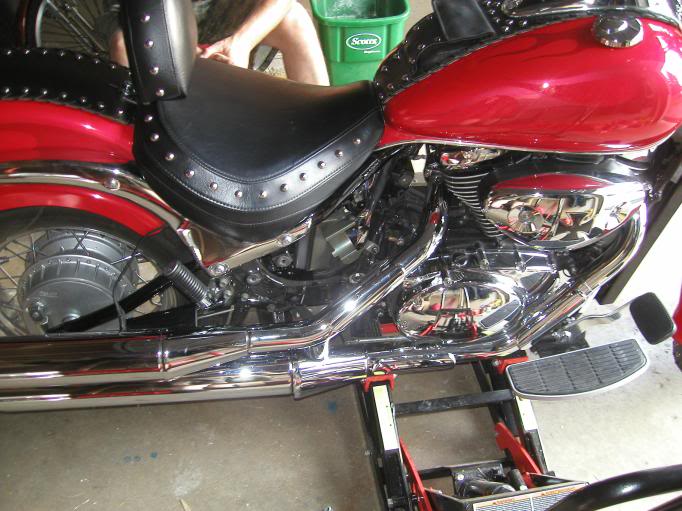
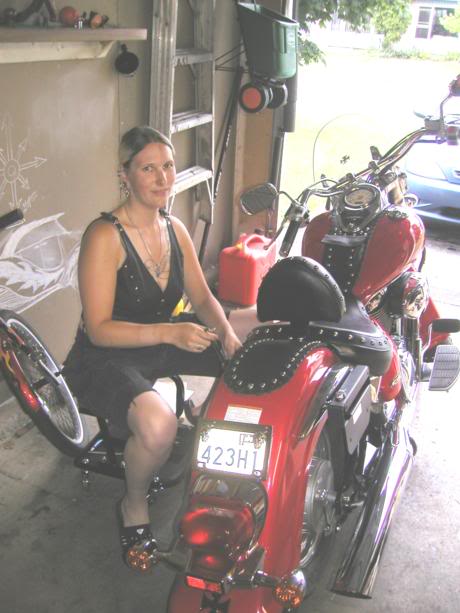
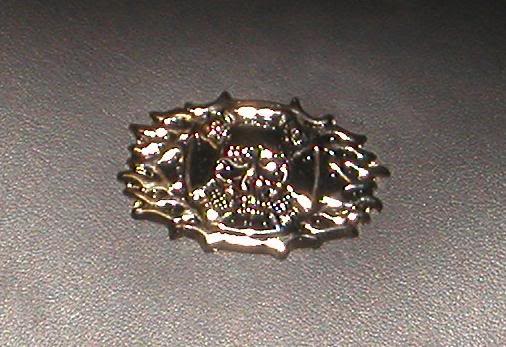
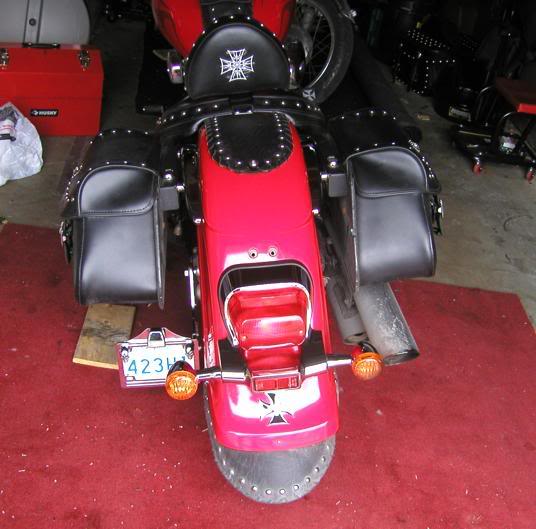
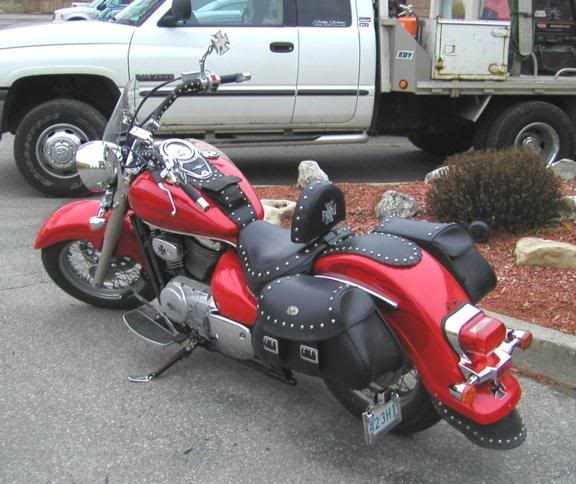
| This thread is without doubt one of the most comprehensive write ups you will ever find Thread reproduced with the expess permission of Mistress K Mistress K's adventures in modifying The above photo was taken the day i picked up my bike - september 26th, 2005. the bike itself is a 2005 Suzuki C50 Boulevard Canadian Special Edition with studded seat and stock red-on-red flames. My bike is beautiful to begin with, but now it's time to make it mine!INDEX The above photo was taken the day i picked up my bike - september 26th, 2005. the bike itself is a 2005 Suzuki C50 Boulevard Canadian Special Edition with studded seat and stock red-on-red flames. My bike is beautiful to begin with, but now it's time to make it mine!INDEX1, trik topz iron cross valve stem caps added 2, ride bell add 3, gas cap mod 4, remove left swing arm 5, remove rear reflectors 6, remove front reflectors 7, relocate licence plate 8, decal added 9, mud flaps added 10, chrome decrotive edge for licence plate 11, oooh some ones happy 12, chrome oil bolt added 13, chrome trim for tank & speedo added 14, dropped rear shock 15, tank bra added 16, fenda bib added 17, chrome triple tree cover added 18, chrome risers added 19, back rest added 20, wind shield added 21, chrome brake reservoir cover added 22, leather sidestand cover added 23, wins best in show 24, side stand mod 25, lowering bones added 26, saddle bags & fitting kit added 27, kuryakyn levers added 28, studded leather handlebar wrap added 29, brake peddle mod 30, swingarm cover mod 31, mirrors added 32, side mount licence plate holder added ....................1....................i started off simple, with some trik topz iron cross valve stem caps
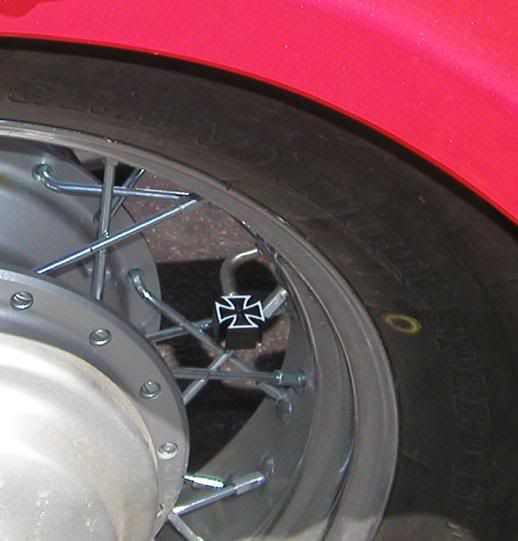
time: 5 minutes
tools needed: none
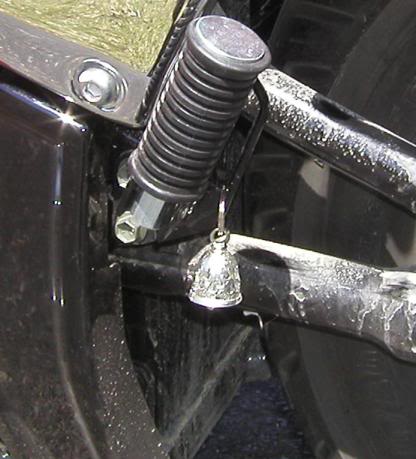
instructions: thread off existing caps, thread on new ones....................2....................and a ride bell with flames on it, generously sent to me by karl k. (kozmo659 on volusiariders.com)
time: 2 minutes
tools needed: none
instructions: use the split ring already attached to the bell to attach to the passenger peg bracket....................3....................and then i went nuts on saturday, april 8th, 2006 and did five mods in five hours!
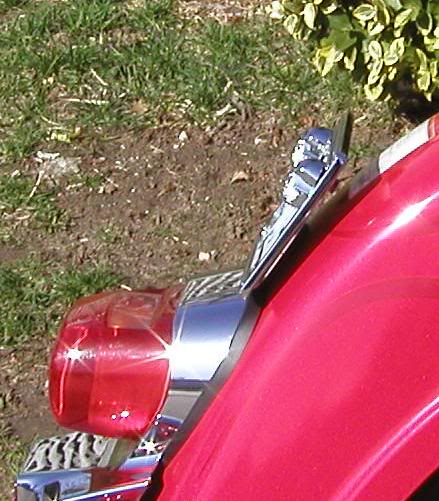
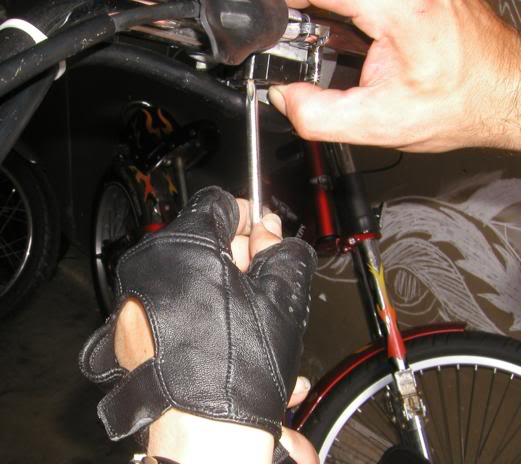
i started with the gas cap mod - you dissassemble the gas cap, and put loctite on the one little screw that retains the spring which keeps tension on the chrome keyhole cover. not doing this can lead to your cover winging away when the wind hits it!

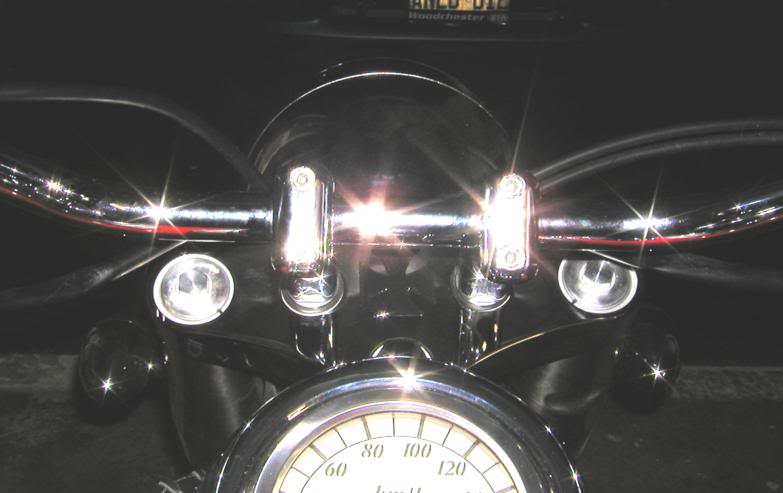
time: 10 minutes
tools needed: #2 phillips screwdriver, #1 phillips screwdriver (old and worn down is best - the threads on the tiny screw you need to loctite are not deep enough to accomodate the point of a brand new 'driver).
my husband says only i would work on a gas cap with a lit cigarette in my hand *lol*
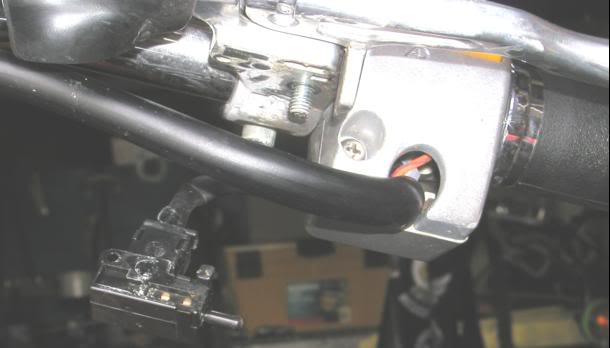
you can see how tiny the retaining screw is in this pic:
 ....................4.................... ....................4....................
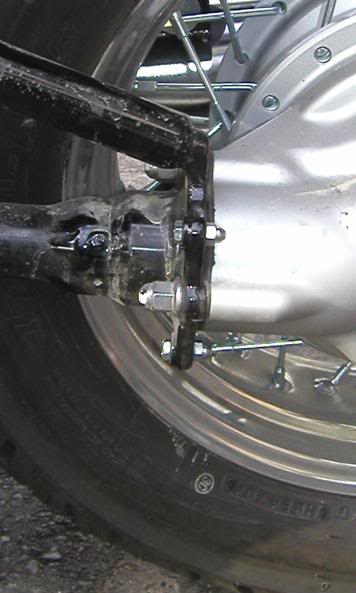
next i removed the left side swingarm, which is fake! it only takes 5 bolts to remove.

time: 15 minutes
tools needed: 10mm socket, 10mm box wrench, i think it's like a 7mm or 8mm hex key
instructions: remove big black bolt w/allen key from back of swingarm @ final drive, and two bolts that go through swingarm from front to back at front of final drive unit (see photo below w/acorn nuts)
the bottom bolt shown here behind that strut is the biggest pain in my arse ever! no way to get a socket in there, and you only have an inch of play with a 10mm box wrench! aaargh!

instructions: remove the left side lower frame cover, and get after these with the 10mm box wrench, being careful to watch your knuckles!
but doesn't it look nice an clean now?
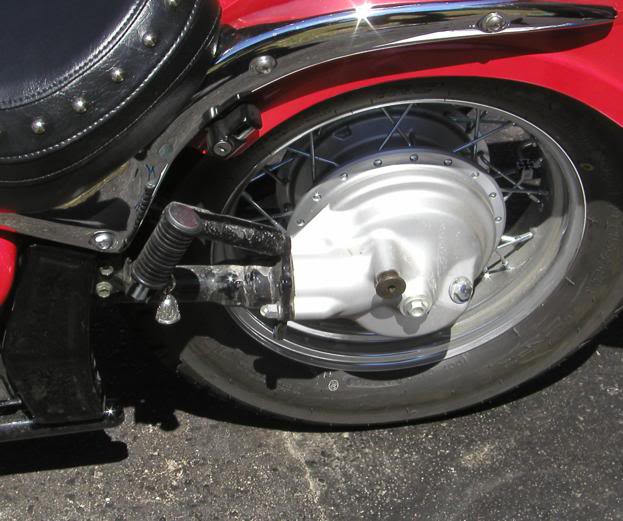
i used the chrome acorn nuts from the license plate bracket and some new nickel plated bolts to fill the holes by the final drive unit.
 ....................5....................next i had to get rid of those stupid standup rear reflectors...i might buy some little red iron cross marker lights to install on those brackets later, but i don't have the bucks right now so off they come! i've kept them in the garage, 'cause i never throw out parts. ....................5....................next i had to get rid of those stupid standup rear reflectors...i might buy some little red iron cross marker lights to install on those brackets later, but i don't have the bucks right now so off they come! i've kept them in the garage, 'cause i never throw out parts.

time: 20 minutes
tools needed: 10mm socket & ratchet, #2 phillips screwdriver
instructions: undo bolts under fender that hold the taillight assembly on. pull taillight unit away from fender, being careful not to break any wiring connections. undo brackets on back of assembly with screwdriver.
much cleaner without those idiot things!

....................6....................next i got rid of the front left side reflector by just bending the bracket back and forth until the weld holding it on inside the fender broke. very little patience!
time: 5 minutes
tools needed: sheer force of will
instructions: bend it back and forth until it lets go!
and i nipped off the end of the rotor side bracket with bolt cutters, then bent the top down behind the speedo cable. this allowed me to keep using the two wire retaining clips on the bracket.
time: 15 minutes
tools needed: bolt cutters, heavy pliers
instructions: clip the bracket just behind the reflector, then bend the top down behind the speedo wire, making sure no sharp edges sit against the wire!....................7....................
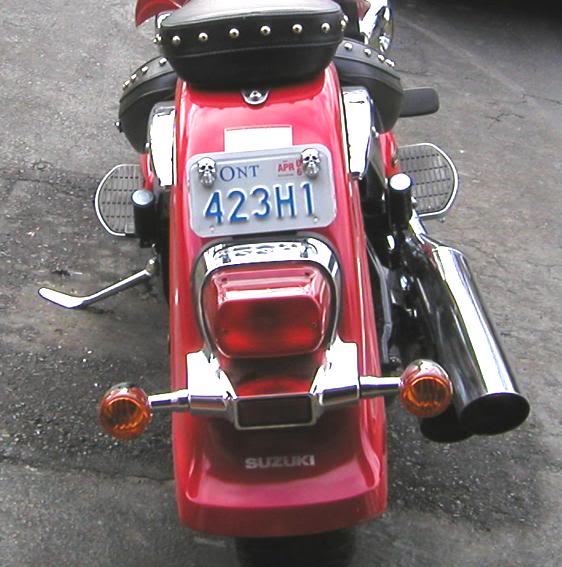
and last, i took off the chrome license plate bracket, drilled 2 new holes in the plate backing, and put 2 new bolts with lock washers and nylock nuts through the fender to lay my plate down. i can still see my info sticker, and i can use the skully bolts off my 1979 honda cb400 now!
time: 30 minutes
tools needed: 2 new bolts, washers, nuts, socket large enough to fit over the new bolts, ratchet, phillips screwdriver, power drill
instructions: i'll let you read them here, which is what i did!
much lower profile now.
that's it for right now...we put about 80km on her on sunday, and i'd swear she's a little faster after losing all that dead weight...next up: decals and mudflaps, once it gets warm enough to wash it!
well, got a nice day for good friday, so i washed and detailed the whole bike, and started in on the new mods. here's my official suzuki washcloth: ....................8....................now for some decal ....................8....................now for some decal
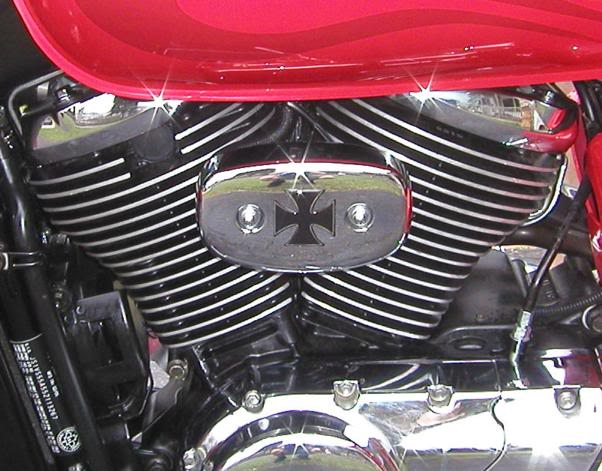
an iron cross decal on the airbox cover
one on the pair valve cover
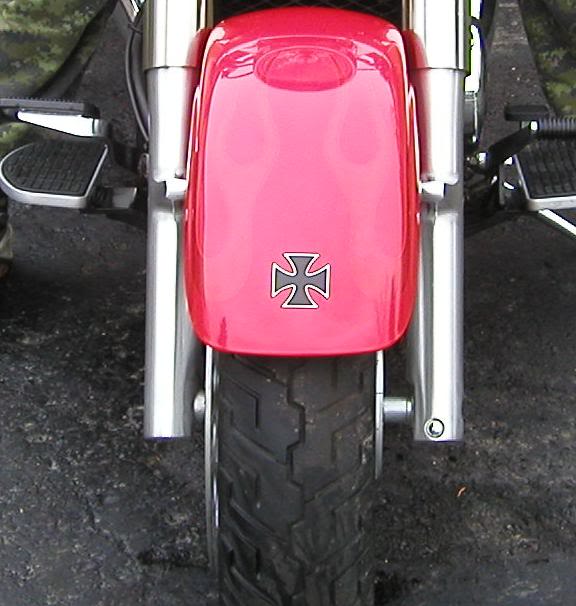
one on the front fender, between the ghost flames
and one to replace the "suzuki" decal on the rear fender

time: 5 minutes
tools needed: a sharp eye for positioning, or a ruler if you wanna get anal retentive about it
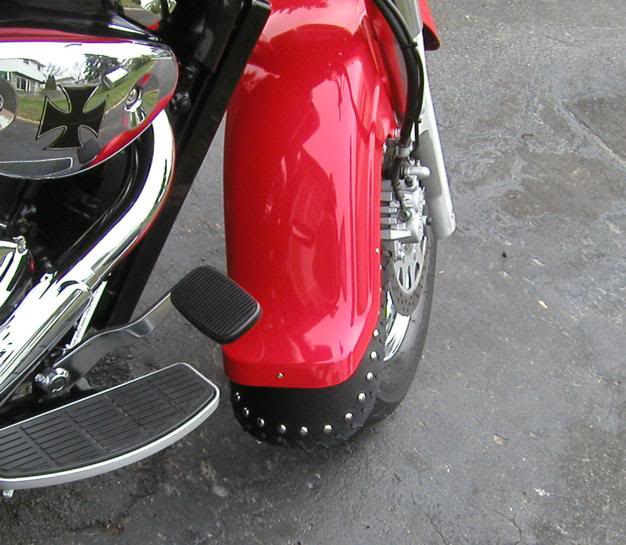
instructions: make sure the surface is clean, dry and lint-free (use tack cloth if neccessary), position decal over part, then place on and smooth down from center to edges, all around.....................9....................then i started putting my mudflaps on the front (which was kind of an arsepain)
time: 30 minutes
tools needed: masking tape, power drill, 9mm box wrench, #2 phillips screwdriver, pen or marker, leather punch, provided bolts plus 2 1/4" longer bolts of similar diameter.
instructions: mask off edge of fender, and drill a pilot hole then full size hole at dead center back. put flap inside fender, and put provided bolt through alread-punched hole in flap and new hole in fender. tighten nut on bolt only finger tight - this will align the flap. then take backing off sticky velcro, and use velcro to position flap fronts. mark place to drill, then drill pilot hole through fender and into leather of flap (marks place to punch hole) making sure to keep flap tight to inside of fender while drilling, and avoiding puncturing your tire! repeat for other side, remove flap, drill out pilot holes to desired size. remove masking tape, and put provided bolt through flap at dead center back, then use 2 longer bolts to secure the flap fronts to the sides of the fender. secure all nuts tightly.
and then on the rear, which due to the pipes was a somewhat bigger arsepain
time: 30 minutes
tools required/instructions: same as above, but fender sides do not require longer bolts. hole on pipe side of fender may need to be different from shaft side of fender due to difficulty of drilling without removing pipes.
but as you can see, it looks pretty damn hot now!

and i tell ya, i'm certainly happy with it!


and now my bike matches the rest of me!
 ....................10....................i also picked up a chrome plate frame on saturday, while at zdeno cycle picking up tanker's bike from having new tires put on. looks much nicer now! ....................10....................i also picked up a chrome plate frame on saturday, while at zdeno cycle picking up tanker's bike from having new tires put on. looks much nicer now!

time: 5 minutes
tools needed: 10mm box wrench
instructions: put plate bolts through holes in plate frame and plate, then thread on nuts and torque down
and the side view - nice chunky bit 'o chrome!
so pretty and shiny in the sun..
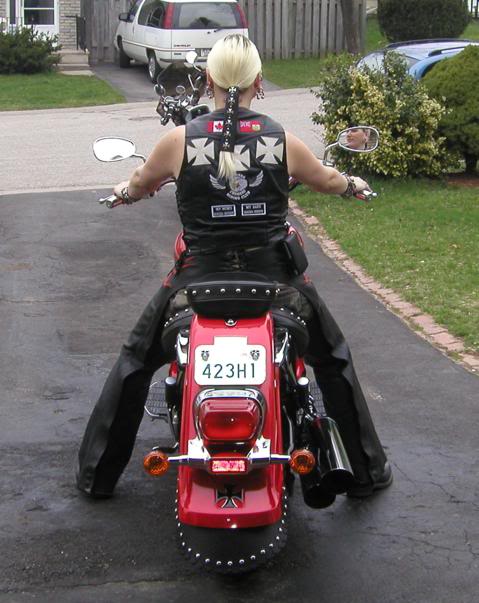
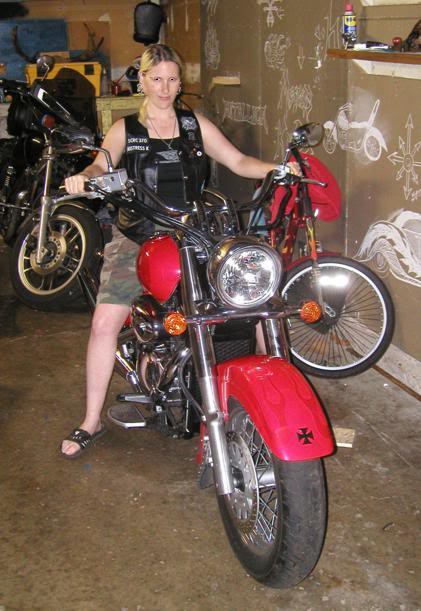
....................11....................and here you can see the sheer unadulterated joy of owning the bike of my dreams! ....................12.................... ....................12....................
my new rear bolt, from wiseguydave on volusiariders.com. dave rawks!
time: 1 minute
tools needed: the same 7mm or 8mm hex key used to remove the original bolt when removing the swingarm, the oil drain bolt from a BMW 1200
instructions: thread the big black ugly bolt out, thread the new bolt in. voila!
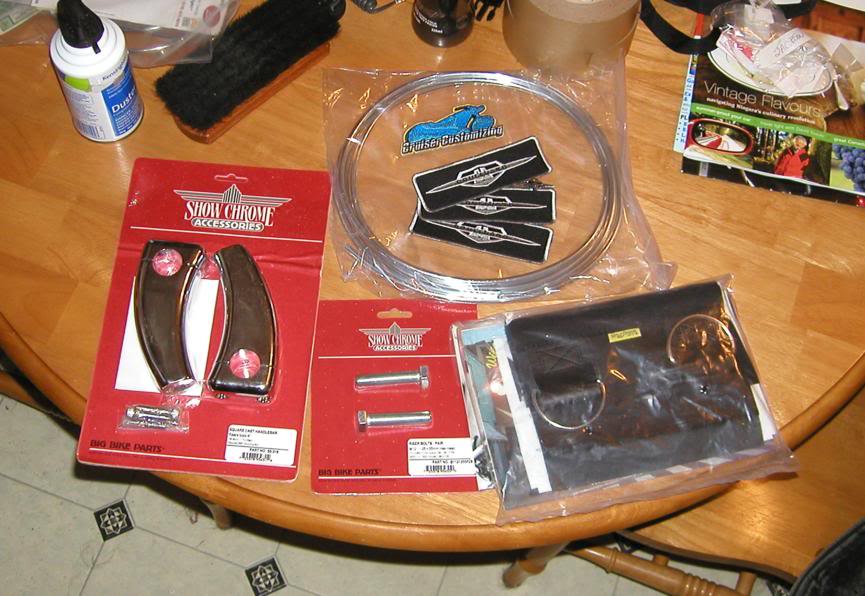
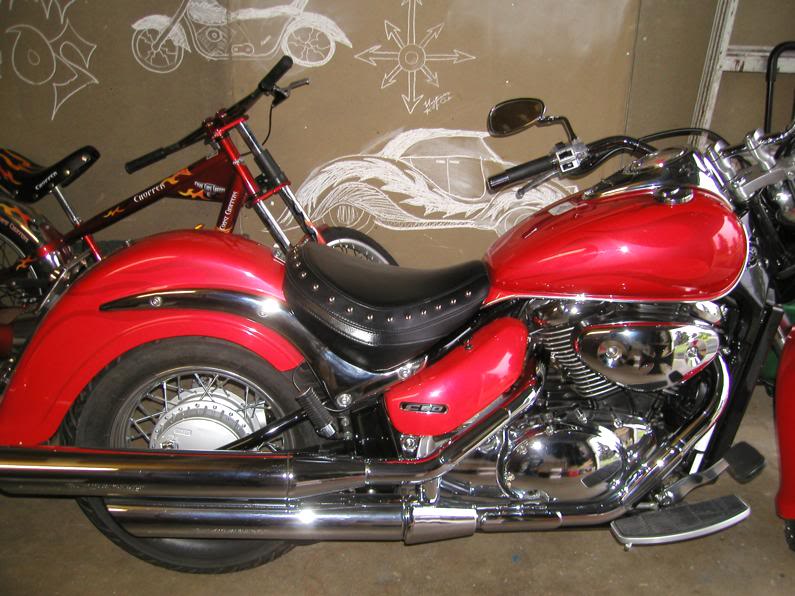
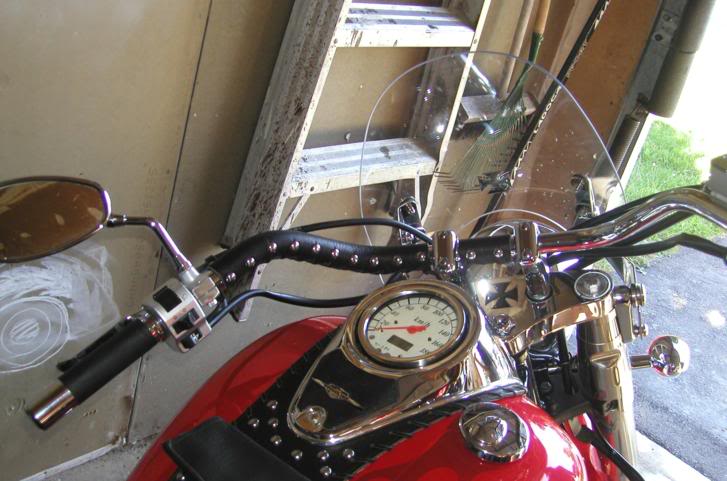
on may 11th, 2006, my original cruisercustomizing.com order was waiting on the doorstep when we got home from picking up 3 boulevard logo patches and a logo pin from two wheel motorsport in guelph. what a haul!....................13....................
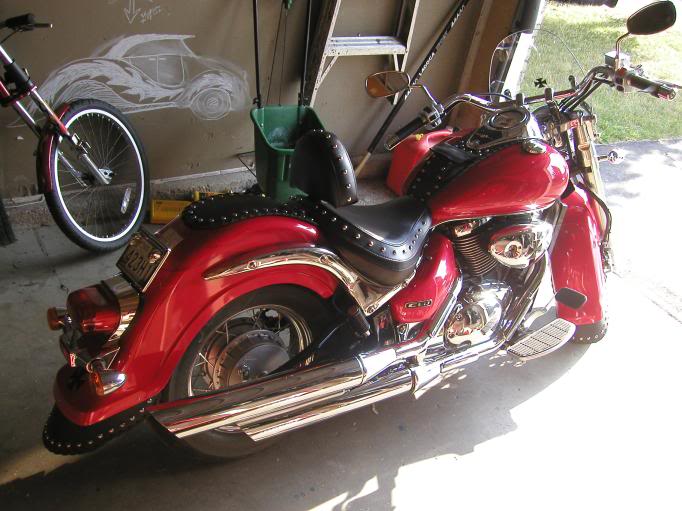
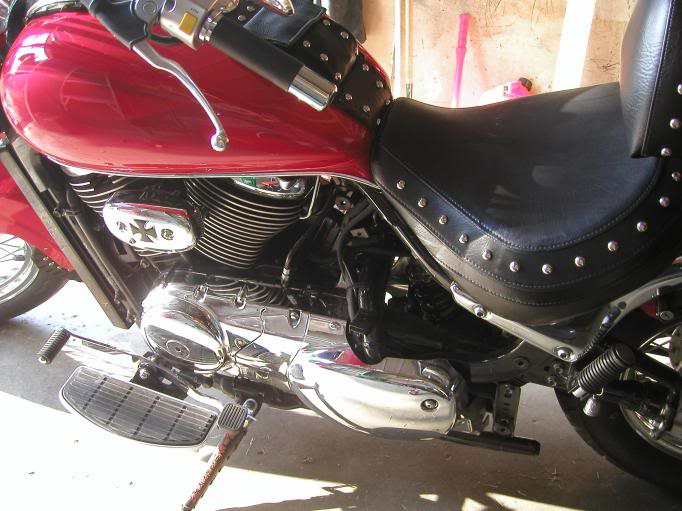
chrome trim on tank and speedo
on saturday the 13th, i stripped the seats off..
time: 5 minutes
tools needed: 6mm hex key, 10mm box wrench
instructions: remove rear bolt from pillion seat, tug strap off pillion seat and lift off seat, remove bracket that attaches strap to fender, remove 2 bolts in rear tab of saddle, lift off saddle

and took off the speedo console..
time: 2 minutes
tools needed: 3mm hex key
instructions: remove bolts from speedo console (2 at front corners, 1 at bottom of console). lift up, push back rubber housing covering plug for wiring, depress tab on top of wiring harness plug while pulling on plug to remove

to install my chrome tank trim.
time: 20 minutes
tools needed: small flat-bladed screwdriver, hair dryer, tinsnips
instructions: use screwdriver to prise apart channel in chrome trim, attach at tank seam under saddle first. continue to push trim onto tank seam, heating the trim with the hairdryer to bend more easily around curves and corners. finish under other side of saddle, and use tinsnips to cut to length

looks much more finished now!

and i had enough left over to finish the edge of the speedo console as well.
time: 15 minutes
tools needed/instructions: same as tank trim above

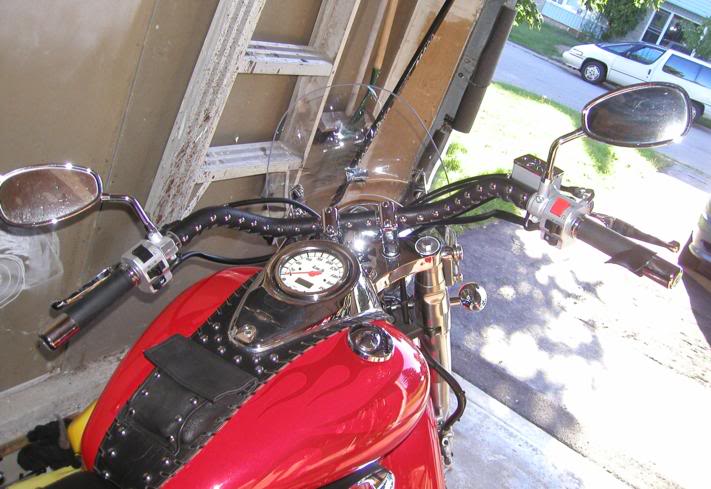
and i think it looks pretty damn sweet!....................14....................now i'm still waiting on the chrome triple tree cover ordered from cruiser customizing, the tank bra and fender bib from chil howee leathers, the backrest from lonnie of grasshopper limited (and volusiariders.com), my windshield and mounts from viking motorcycle, and my iron cross reservoir cover, whose manufacturer will not be revealed until i have it in my hands!
in the meantime, i've left the pillion seat off and dropped the rear shock 2 notches, as the chil howee order should be in by about wednesday the 17th. i can hardly wait! and until then, the drop in the rear shock is doing wonders for my bad back, as proven on a half hour ride this afternoon!
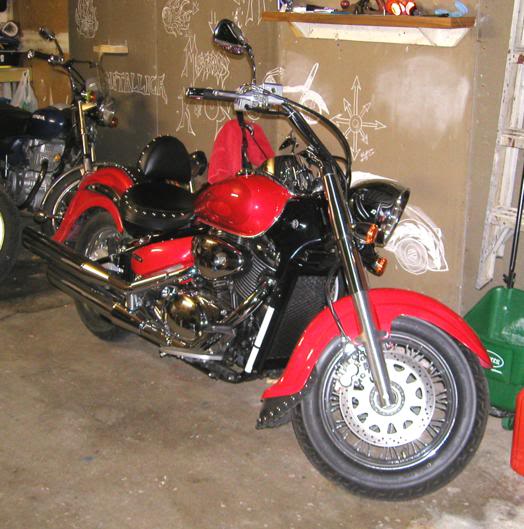
update: got the chil howee order in on may 15th, and since it was raining i couldn't ride anyway! here's the bike with all the trim (before photo):
 ....................15....................adding tank bra ....................15....................adding tank bra
now, the best way to do this is to remove the saddle (pillion comes off first, if it's still on there - see chrome trim mods above for instructions), and remove the speedo console to do the tank bra first:
CAUTION!
if you have done the chrome speedo trim detailed above and are installing a tank bra that sits under the console, you will need a longer bolt for the bottom (saddle side) of the console! the tank bra, in combination with the trim, raises it enough that the stock bolt will not reach the threads!
i found an oval head phillips machine screw of the same thread pitch, and used a chrome finishing washer under it. looks a bit nautical, which as a sailor of 26 years, i don't mind!
time: 20 minutes
tools needed: 6mm hex key, 3mm hex key, 12mm wrench, lots of patience
instructions: remove seats, remove console, loop top hole in bra over two arms with rubber washers & threads where speedo attaches to get it flush against the tank, pull & push until metal tang @ bottom of console area comes through slot in bra, attach bottom of bra @ tank bolt (under saddle, and put the leather under the washer), plug in and re-mount speedo console (this is the bit that takes patience!), set saddle on bike and proceed to fender bib install....................16....................the fender bib comes next:

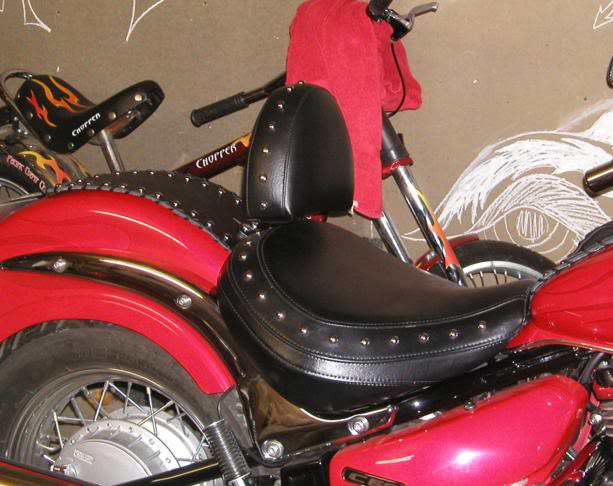
i love the way it sets off the stock studs on the saddle!
time: 10 minutes
tools needed: just the 6mm hex key
instructions: put the 2 rear saddle bolts through the tab on the back of the saddle, then push them through the 2 slots in the leather of the tank bib. line up the bolts with the collars through the fender, and thread in finger tight. then put the rear pillion bolt through the bib and line up with the collar in the fender. tighten everything down, making sure you're centred to the fender, and you're done!
i just couldn't be more pleased with the way it looks now!
now that's sexy!
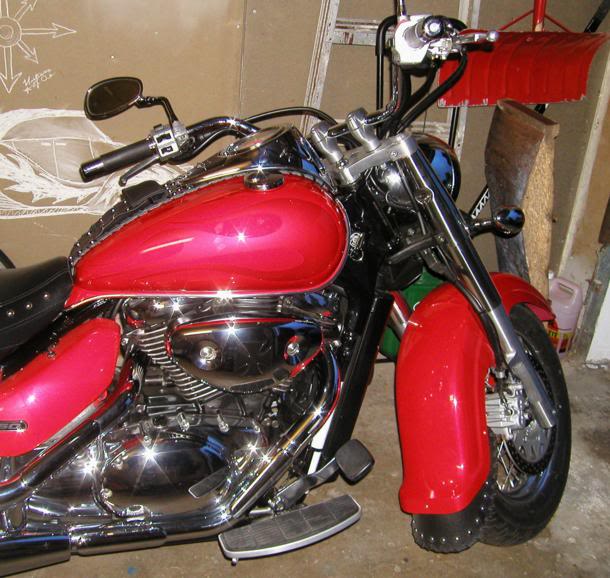
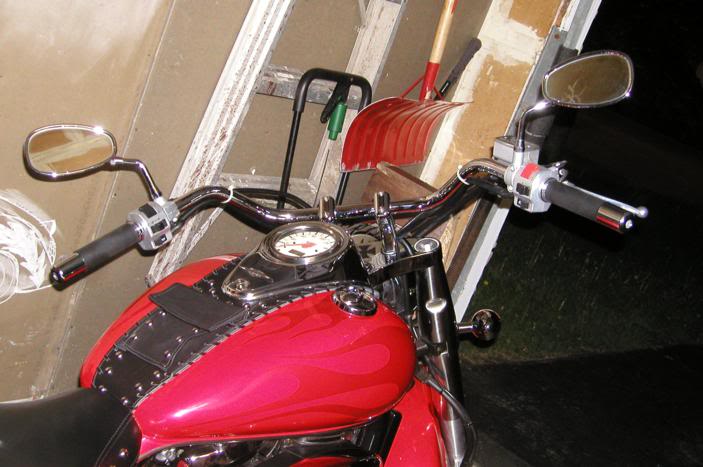
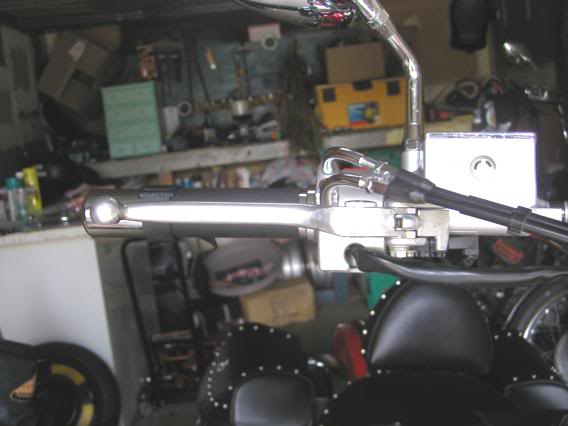
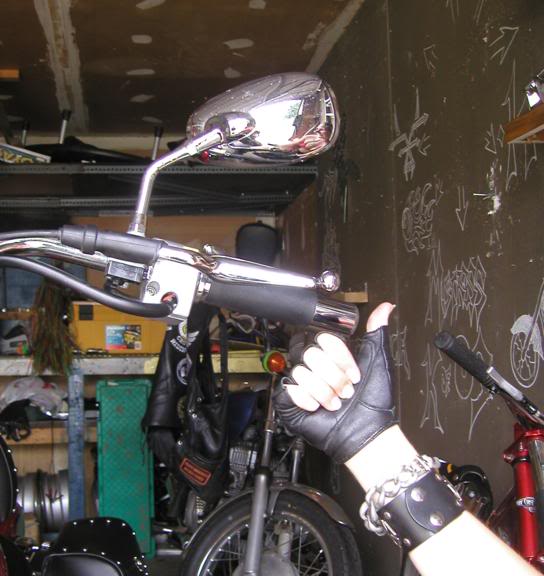
the windshield and mounts will be in tomorrow...have to see (once i've read the instructions) whether i'm going to do this myself, or if i'll make it someone else's problem  ....................17....................update: the chrome triple tree cover, windshield and mounts arrived may 16th, 2006. having taken a look at the windshield mounting instructions, i can totally do this myself, but the chrome triple tree cover needs to go on first so i set about gittin-r-done! ....................17....................update: the chrome triple tree cover, windshield and mounts arrived may 16th, 2006. having taken a look at the windshield mounting instructions, i can totally do this myself, but the chrome triple tree cover needs to go on first so i set about gittin-r-done!
first i stripped off the stock risers, getting tanker to hang onto the bars for me

tank seems a little confused as to why the forks won't turn for him
time: 15 minutes
tools needed: torque wrench, 19mm socket, 6mm hex socket, flat bladed screwdriver, a friend or family member
instructions: cover your tank and front fender with a towel first! crank the bars all the way over in one direction, then get the 19mm socket on your torque wrench from the rear of the front end and crack the riser bolts loose from the bottom of the triple tree clamp, but do not remove the bolts yet. they are torqued to about 50 foot-pounds, so adjust your wrench accordingly. use the flat bladed screwdriver to carefully prise off the chrome hex drive bolt covers on the riser caps, and then use the 6mm hex socket to remove the riser caps. have your assitant hold the bars while you switch back to the 19mm socket and completely remove the bottom of the stock risers. save the washers from the top and bottom of the triple tree clamp! your helper may find it easier to hold the bars out of the way if you carefully snip the cable ties that bind the wiring to the bars.
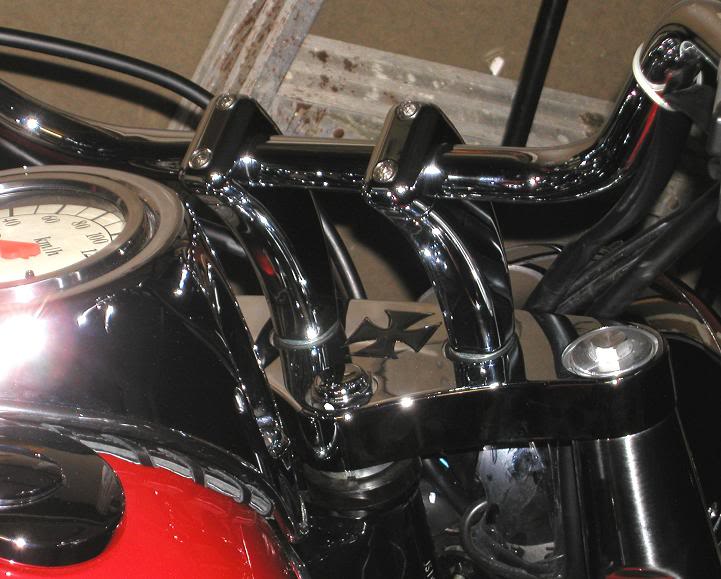
next i installed the triple tree cover, after putting an iron cross decal on it front and centre
lookin' pretty sweet!
time: 5 minutes
tools needed: willpower, towel, rubber mallet (persuader)
instructions: seat the rear side of the cover first, as you will have to use some force to get it over the ends of the triple tree clamp bolts (the bolts threaded horizontally into the triple tree that stick out just a little directly behind the forks). then push the front on as well. lay the towel over the cover (to avoid any scratches or other marks), then use your mallet to tap it into place. it should sit just about flush with the triple tree itself....................18....................next step was to install the new risers - i chose the show chrome 4" square cast solid risers seen here, with the appropriate hardware (2 bolts) for my bike

time: 20 minutes
tools needed: torque wrench, 19mm socket, 5mm hex socket
instructions: coat the new bolts with thread lock, and slide through the triple tree clamp from the bottom, using the washers you saved from removing the stock risers (you did save them, right?). thread finger tight into the bottoms of the new risers, and tighten down, but not so much they begin to turn the riser body. have your helper place the bars in the tops of the new risers, but don't worry too much about bar positioning yet. install the riser caps using the 5mm hex socket (size may vary with different risers), tightening only enough so that the handlebars do not move when your helper lets go of them (use care when checking whether or not you've got a bite!). then proceed to torque down the riser bolts from the bottom of the triple tree clamp to 50 foot-pounds. now sit on your bike, and have your helper loosen the cap bolts until the bars move, and position to your liking. then torque down the riser cap bolts until there is no longer any space between the riser body and the riser cap. please note: longer risers with more pullback may require the installation of longer cables on the front end! research is your friend here!
the view from the saddle has definitely improved!
the more i look at this pic, the more i think the risers are a little bit cockeyed. might have to fix that tonight
is it just me, or is she getting just a little sexier every day?
i think you can tell how i feel about my new mods
i was pretty knackered after this, and it was getting pretty late, so i figured i'd knock off for the evening and wait until the next day to install the windshield and mounts. also have to see if anything else comes in! also need to see if i can straighten out the risers a bit, 'cause the "nice view" pics makes them look a little crooked..
....................19....................my backrest from lonnie came in on may 17th! took less than a minute to install, and is so comfortable!
time: 1 minute
tools needed: 6mm hex key or hex socket & ratchet
instructions: remove bolts in rear tab of saddle. put bolts through mounting bracket, through tab, and into collars in the fender. tighten, then slide tab on backrest into mount, and ride away! (note: if you have the chil howee fender bib, you will need to remove the rear bolt on the bib as well to allow you to lift the bib and push the rear saddle bolts through the leather again, after putting said bolts through the mounting bracket)

looks pretty dang nice though!

and of course, removal is easy as pie - just lift the backrest off!
i also got my risers straightened out a bit
and all that chrome just looks so nice - really pleased i found another spot for an iron cross, too!
she's looking mighty fine now!

and i couldn't be more pleased!
since it finally stopped raining and the sun came out for a few hours, this is all i did last night apart from ride! the risers are absolutely perfect for me - my hands are just where i want them, and the backrest is just dreamy! so, so comfortable on my bike now...even my low speed cornering has gotten better, because my hands are a little higher and no longer feel like they're going to hit my legs when i lock the bars over! i never thought the handling in the twisties could get any more effortless than it was stock, but i guess i've been proven wrong!
it's pissing again today (the 18th), so maybe i'll finally manage to get that windshield on tonight! wanted to ride with the risers alone first, though, to see what the handling would be like. i'm just getting her the way i want her - don't need to do any damage due to too many new things at once!
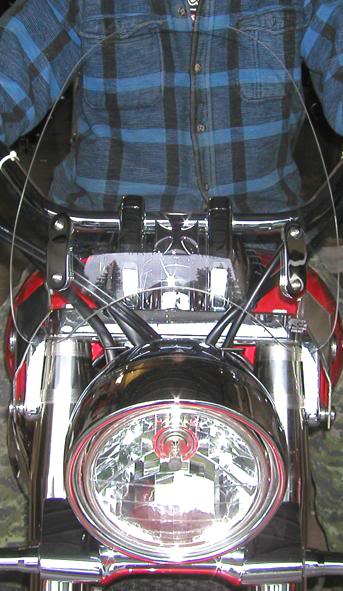
update: couldn't do anything on the 18th, because i worked late, then came home to the whole back of our house going dark when i flipped on a light! had to rewire the light fixture in the laundry room to fix it, at least temporarily...and didn't even have enough time afterward to go for a damn ride, despite the fact it was sunny when we got home.. *grr*....................20....................pissing rain again on friday the 19th, so what else can i do but install the windshield finally?

the first thing to do is install the mounts on the forks, which is relatively simple, although getting them perfectly straight is not!

time: 1 hour
tools needed: 4mm hex socket, torque wrench capable of measuring 50 inch pounds (NOT foot pounds. inch pounds. had to go buy another stupid torque wrench, 'cause 50 inch pounds is about 4-and-a-bit foot pounds, and my new torque wrench is only good from 20 to 100 foot pounds!)
instructions: put your "burr protectors" on the triple tree sides, with the flat side of the semicircle along the bottom edge of the triple tree clamp or the triple tree cover. put the metal rings on the fork shrouds (small above large), and attach the spider bracket with the longer bolt at the top. put the chromed plate over the bolts, put the brass washer on the top bolt, push the top nut (larger) through the top spool (also larger) skinny side toward the nut, and thread onto top bolt. push small (lower) nut into small (lower) spool, thread onto bottom bolt. repeat on other fork. tighten all bolts to 50 inch pounds

then you put the brackets on the shield itself
time: 5 minutes
tools needed: 9/16" socket, ratchet
instructions: the brackets to attach go outside the brackets already attached to the shield, with the bend to them going outward, and with the acorn nuts on the inside of both of brackets (carriage bolts go from outside to inside). don't tighten these too much yet, but get 'em so they don't move

now put the shield on the bike
time: 10 minutes
tools needed: a firm hand and a helper
instructions: straddle the front wheel while your helper sits on the bike, holding it level. flex the shield slightly to line up the bottoms of the mounting brackets with the bottom spools, and drop the cutout at the bottom of the bracket onto said bottom spools. it should slide on and down fairly easily. then, grasp the shield with the butts of your palms just above the chrome brackets on the front of the shield. have your helper apply the front brake (no kidding), and push for all you're flippin' worth to get the top cutout to seat on the top spool. notes: if it feels like you're going to snap the shield, try loosening the nuts on the top spools a quarter turn. also ensure that the mounts on the forks are aligned, or you'll be beating your head against the wall!
i ended up finally getting the dang thing on, and noticing my alignment was out a bit. i loosened off the mounts that weren't where i wanted them with the shield on and using the distance between the edge of the shield and the handlebars as a reference to get it straight. then i re-torqued the mount nuts. after that, i sat on the bike, and loosened off the bracket nuts to adjust the rake
time: 10 minutes
tools needed: 9/16" socket, ratchet, torque wrench capable of measuring 15 foot pounds
instructions: while sitting on the bike with the bracket nuts loosened, adjust the rake of the shield by grasping the top and moving up or down. then have your helper hold the shield in position, and tighten the bracket nuts with the ratchet. now, take the shield off again and use the torque wrench to get those nuts down to 15 foot pounds (note: national cycle says to do this with the shield on the bike. there just ain't enough clearance on my bars to do this, so i politely ignored them)
then you go through the tiresome process of mounting and un-mounting the shield on the bike five - yes 5 - times, and check the tightness of the mount nuts again, making sure they are at 50 inch pounds.

bloody tiresome process, but i like the fact that the shield is almost invisible! let's just hope when the rain finally buggers off that it'll do its job.
well, i'm out of parts for awhile...and out of cash for more parts too! now we'll try to see what we can do about some mods for tanker's bike, 'cause i know he's starting to turn a little bit green..
i did one more mod on may 20th, which i've been very lax about posting
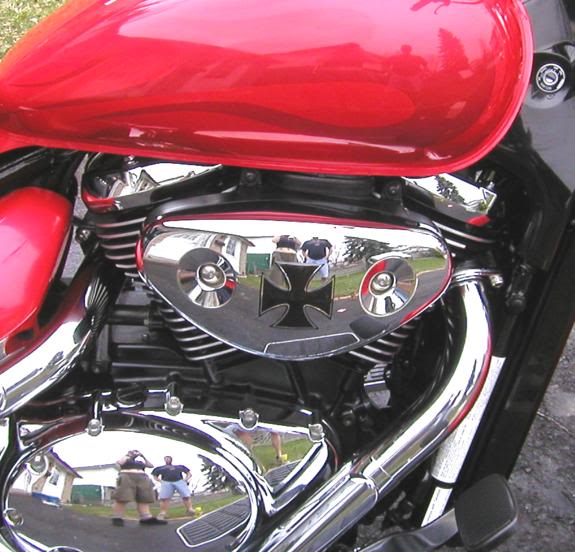
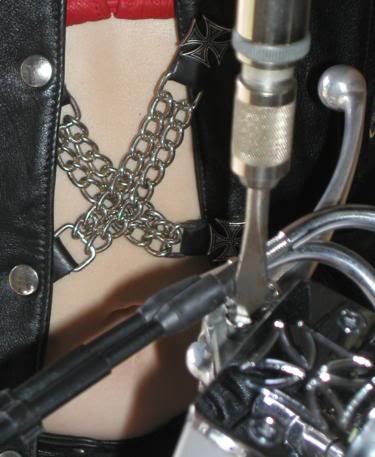
a little note about the iron crosses: these symbols come from a german military medal that was awarded for bravery in battle. they have since been adopted as a symbol of the "chopper" world, which is where most people know them from (west coast choppers likely being the most prominent example). for my part, i like the look, and use them as a symbol of the courage it has taken to get into riding bikes, and face various challenges in the learning process. this cross on my shield was installed just after i passed my first vehicle ever on a 2 lane highway, and got my bike up to 130kph indicated for the first time!

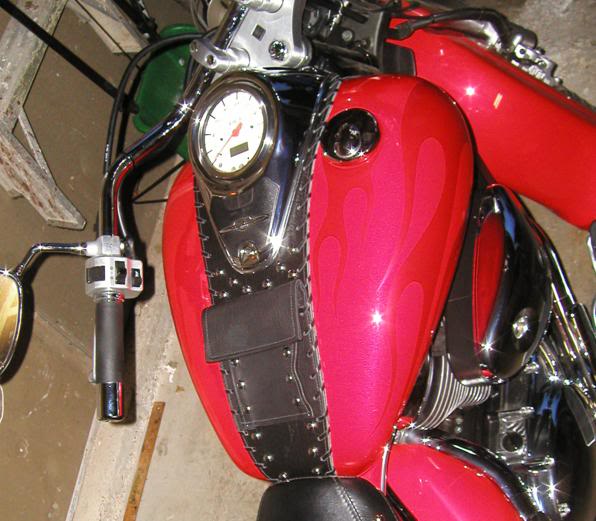
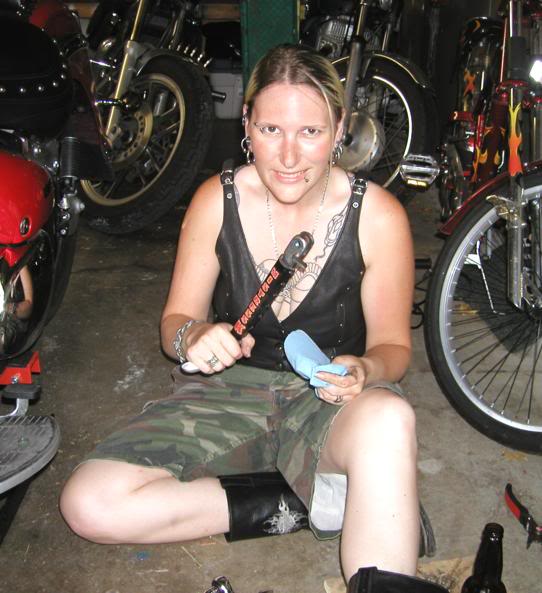
i think it's the perfect highlight - i can even see the reflection of it in the speedo housing from the front, and on the triple trees from the saddle (along with being able to see the silver back of the cross itself through the shield)....................21....................june 2nd, 2006 i received my custom frogskin from ken (a.k.a. froghunter) on volusiariders.com in the mail! and since my friend mike from panther had let me know he'd be dropping off my new reservoir cover on saturday, i decided that june 3rd was to be a mods day!
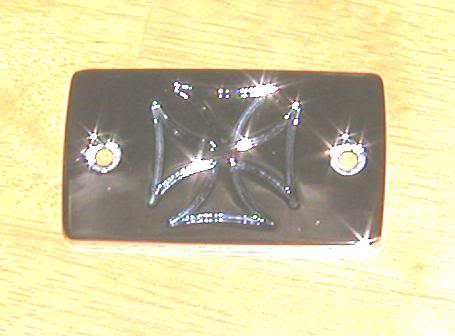
the chrome on this piece is just gorgeous. i had been thinking, before i saw it, of filling the milled outline with some black enamel. however, there's just no need! it's perfect just as it is :)
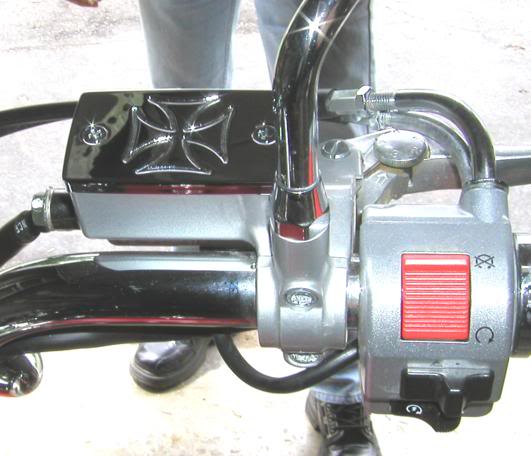
and here it is, mounted on the bike
time: 2 minutes
tools needed: #2 phillips screwdriver
instructions: make sure the master cylinder/brake fluid reservoir is as level as possible by turning the bars, and remove the 2 screws on top that hold it in place. remove it carefully, making sure not to disturb the plastic lid or rubber gasket underneath. use the same screws to install the new cover.

i thought this pic was kinda cool because you can see how the milling catches the light. the chrome really is to die for! huge, huge thanks to mike at panther for making this happen. it's not often you can say that you have a part of which only 14 were ever made!
....................22....................then i got on to installing my frogskin..

ken really did a super job - i couldn't be happier!
time: 5 minutes
tools needed: fingers, water
instructions: thoroughly wet the frogskin and lacing. lace the top straight across the bike side of the kickstand, making sure you are in between the stand and the spring. using an under-over method, lace it back and forth, making sure you form the frogskin to the stand as you go, and that the first criss-cross is above the place where the kickstand spring meets the stand (this will prevent the 'skin from slipping). when finished, tie the lacing in a good knot at the outside of the stand, and trim to length.....................23....................the latest mod was done unsuspectingly, and didn't cost me a dime!

time: 3 seconds
tools needed: traffic circle
instructions: round traffic circle at 55kph, turning to the left. roll bike over to the right to exit traffic circle via right turn while maintaining speed. punch fist into air and start screaming 'cause you just scraped your first board! note: according to tanker, this mod results in a 5' long spray of sparks!
on june 29th, 2006 we rode down to the A&W restaurant on hespeler road in cambridge for their cruise night. they have a classic car show'n'shine every thursday, and do theme nights throughout the summer. last night was the first of 3 bike nights for 2006.
after a friend mentioned i should register my bike, and refusing to take "but it's filthy!" as an answer, i signed her up anyway, and to my surprise..

so i'm pretty damn pleased with myself right now, and am currently waiting on the 2" lowering bones from john at john's kits (also a member of volusiariders.com) to drop her rear end and make her look just that much sexier again!....................24....................on july 1st, 2006 (canada day), i figured there was no better way to celebrate the old red and white than to work on my shiny red bike! in preparation for the lowering bones, i needed to grind down the stop on my kickstand (so it comes forward further, and the bike leans over more. makes it less likely to roll off the stand, and less likely to fall over on the other side in a high wind), and cut off the bolts used to do the plate laydown (which extend into the fender more than i'd like, and could possibly do damage to my rear tire after i lower if i bottom 'er out). so, up on the jack she goes!

in order to prevent any damage to the kickstand while grinding, i decided to take it off.

time: 10 minutes
tools needed: 14mm socket, ratchet, 17mm box wrench
instructions: use 14mm socket & ratchet to remove nut at top of kickstand. use 17mm wrench to remove pivot bolt of stand. carefully work stand off of the frame piece by folding it up and down, then remove springs from pin on back of stand. note: the springs are a bloody bugger to get back on! it took me freakin' ages, a couple of chunks out of my knuckles, and the invention of at least 3 new swearwords to get them back on. i also recommend re-greasing the kickstand before re-installing it on the bike, and put fresh threadlock (loctite) on the bolt before putting the nut back on.
"bah, don't need this thing if you never stop moving!"
next i started grinding

..and grinding..
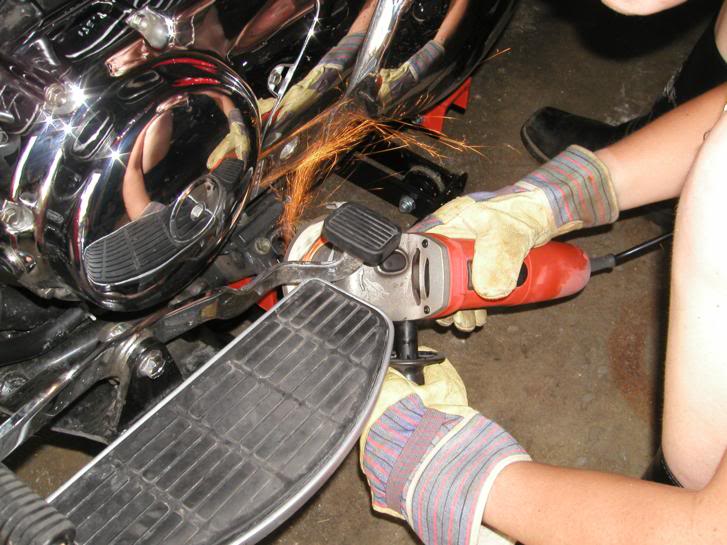
..and did i mention grinding?
and the above photo demonstrates why i wear eye protection! here's the end result:

then, to cover the bare steel and prevent rust, i coated the ground surfaces with black nail polish.
then i re-installed the kickstand. did i mention that i hate those freakin' springs? but she does sit at a better angle now, and the stand comes forward about 2" from where it used to
after this, i used a mastercraft spin saw's fine detail attachment and a cut-off disc to chop about 1/2" off the bolts under the fender. however, our friend cowboy came over just as i was putting the kickstand back on, so tanker was too busy chatting to take photos.

she sure looks purty...and now i just have to wait for the bones to come in, and on they'll go!
on tuesday july 4th, 2006, SCRC 270 did a canada day celebration for our weekly bike night at jose's noodle factory in guelph, ontario. i decided it was time to tart up the bully a bit, because there was a prize for the most "canadian" looking bike!
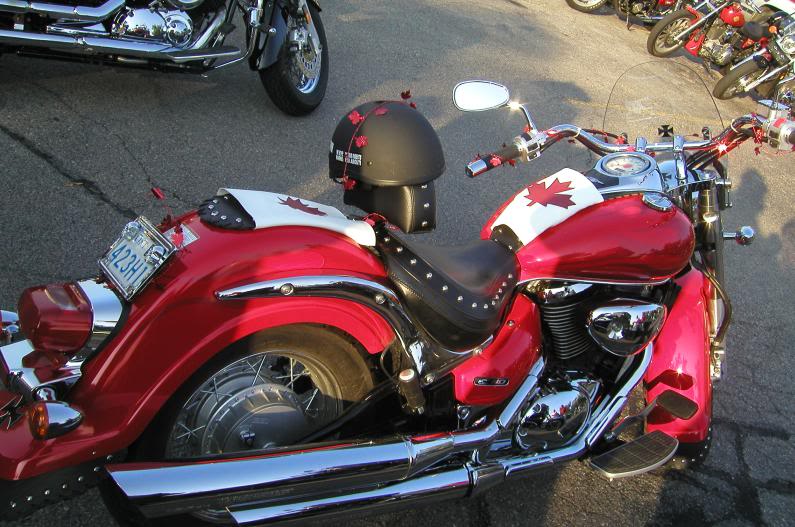
i used some white vinyl that tanker got me, and cut maple leaves out of red vinyl and stitched them on. then i just cut the pieces to size (ok, the fender bib piece got cut a little smaller than i would have liked), and tucked the edges under for the event. i also picked up some holographic maple leaf garland for $1.49 at michaels, and wrapped it around the bars, backrest, and license plate.
i didn't end up winning a prize for it, but one fellow ended up giving me his door prize (gary, you rawk! i mean brad! i mean brian!) because he felt my bike should have taken 1st place. in any case, i think it looks pretty cool, and i'm considering making a proper fender bib out of white vinyl with the leaf to bolt on come canada day next year!....................25....................on friday, july 7th, 2006 my lowering bones came in from john at john's kits, and i decided to get right after it!
here she is before lowering. looks nice, but i'd like the position of the rear mudflap a little lower, closer to the position of the front one.
so we start pulling pieces off, beginning with the sidecover and tool box.
time: 2 minutes
tools needed: ignition key, phillips screwdriver
instructions: unlock cover using key. once unlocked, pull forward mounting post out (front top corner of cover), then firmly pull down and out at the top rear corner of the cover to release rear mounting post from rubber grommet. set aside cover. unlatch plastic clip at top front of toolbox, then pull outward and up to remove and set aside. remove all contents and set aside. remove lower frame cover at bottom rear of tool box by pulling firmly to get mounting posts out of rubber grommets (one top, one bottom) and set aside. use phillips screwdriver to remove one screw from inside tool box near top front, and one screw at top rear (just above lower frame cover's original position). set parts aside.
then remove the rear chrome case
time: 2 minutes
tools needed: 4mm hex key socket, ratchet, 6" extension bar
instructions: remove top front, bottom front and bottom rear allen bolts using ratchet and extension with 4mm hex key socket. the top rear bolt is fake! no need to touch it!. set case aside.
i also removed the right side cover and lower frame cover
time: 2 minutes
tools needed: 4mm hex key
instructions: remove allen bolt from top of right sidecover by the saddle with 4mm hex key. pull firmly away from the bike to remove mounting posts from rubber grommets (one front, one rear, i think..). set cover aside. then remove allen bolt from lower frame cover in behind pipes using 4mm hex key, and pulling firmly toward the pipes to un-mount posts from rubber grommets. once free, pull frame cover up and out, and set aside. i also removed the rear right side cover, for no good reason other than to see what it took and what was under there.
all nice and exposed on the right side now. just need to remove the strut on the left side that holds the electrical box in place
time: 2 minutes
tools needed: 12mm socket, 10mm socket, ratchet, 6" extension bar
instructions: remove the front bolt, which tends to hide behind some wiring, using the 10mm socket and ratchet. then remove the bottom rear bolt on the strut with the 12mm socket, followed by the top bolt (also 12mm socket). gently pull the electrical box out and set it down - there is no need to disconnect the wiring. sorry, i didn't get a good photo of this until much later!

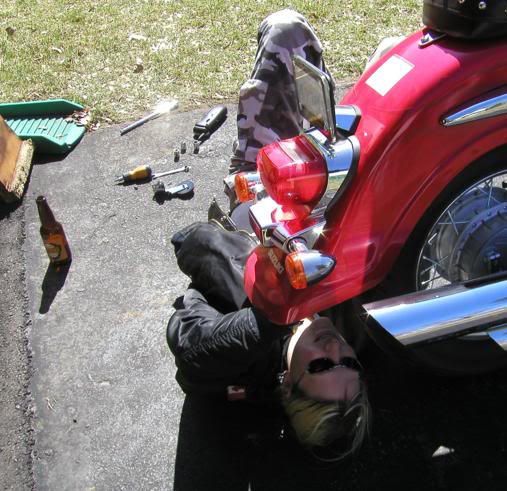
this is tanker being a total bonehead, and looking like he's been possessed by the spirit of cletus the slack-jawed yokel. he's also going about removing the top bolt from the wrong side!
time: 15 minutes
tools needed: 17mm box wrench, 14mm box wrench, 17mm socket, 14mm socket, ratchet, breaker bar (or piece of pipe that slips over the ratchet handle), flat-headed screwdriver, bike jack, rubber mallet, bamboo skewer of the kebab persuasion
instructions: now we remove the stock bones! the first step is to get the jack under the bike, but don't raise it yet! simply position it under the frame, making sure that you are clear of the swingarm. now put a 14mm box wrench on the left (bolt) side of the top bolt on the stock bone, and if you're lucky enough to have a helper (it will be much easier if you do), have them get the 17mm socket on the right (nut) side of the top bolt and use the breaker bar and ratchet to loosen it off. this will take some doing! you'll notice that our piece of pipe is about 7' long, and even with that kind of torque it took tanker (aka operation brute force) some effort to crack 'er loose.
once you've got it loosened off, it's time to jack the bike up. raise it just until the rear wheel lifts off the ground and you can spin it freely.
now use your flat bladed screwdriver and mallet to "persuade" the top bolt to slide out towards the left side of the bike, being careful not to hit the collar it sits in. now you need to remove the bottom bolt. do the same thing again with the bike still up on the jack (do not lower it back down). to remove the bottom bolt once the nut is off (and due to the position, you'll likely have to use a 17mm box wrench to get the nut fully off), you will have to use the bamboo skewer (or other small item, like a hex key) to push the collar around the bottom bolt towards the right side of the bike. once you've got it out a bit, you can reach around and grab it from the right and pull it back manually. this will allow you to get the bolt out without hitting the frame. trust me - it works!
you can just see the new bone from the right side here
time: 10 minutes
tools needed: 14mm & 17mm box wrenches, 14mm & 17mm sockets, ratchet, loctite, new bones
instructions: to install the new bones, you essentially reverse the removal process for the stock bones. put the bottom bolt in first, then lower the bike on the jack until the new bones line up with the top holes. put the top bolt back in before you start tightening the bottom bolt, or the bones may shift and you'll have a devil of a time getting them lined up again. keeping in mind how hard they were to crack loose, i used blue (medium) loctite on the threads at the nut - don't want my arse end suddenly vibrating apart while riding! tighten everything down, making sure the bolt collars are centred back in the original position, and getting it all as tight as possible.
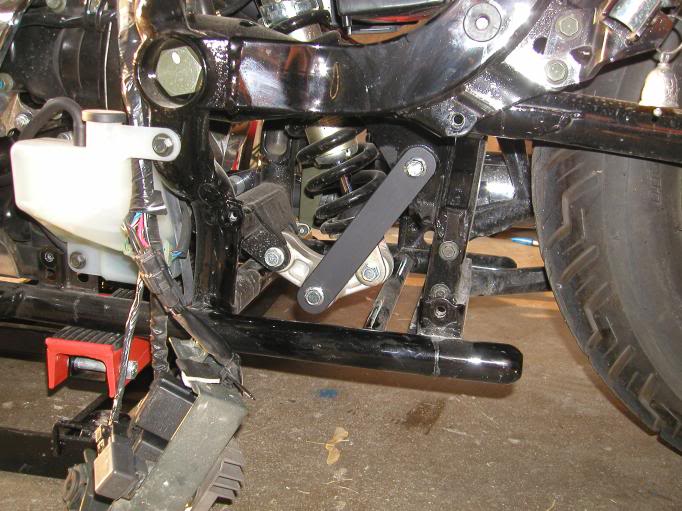
and here you can see the new bone on the left, with the removed strut and electrical box hanging down at the left of the photo
now we just need to slap all the covers back on (though i took the opportunity to clean each one with lemon pledge before reinstallation - call me anal retentive if you want to, but it was easier to clean them before putting them back on than doing so while they're on the bike), and we're done!
and here she is lowered - looks nice!
here's the direct comparison of the pre- and post- shots - 2" makes quite a difference!

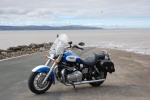
and this photo was taken in port dover on july 9th - 100 mile ride in perfect comfort on my newly lowered ride! you can also see from this photo that i was likely much better off with the 2" bones (for my particular application) than the 2.5" or 3". the clearance is just enough, but she looks nice an low!
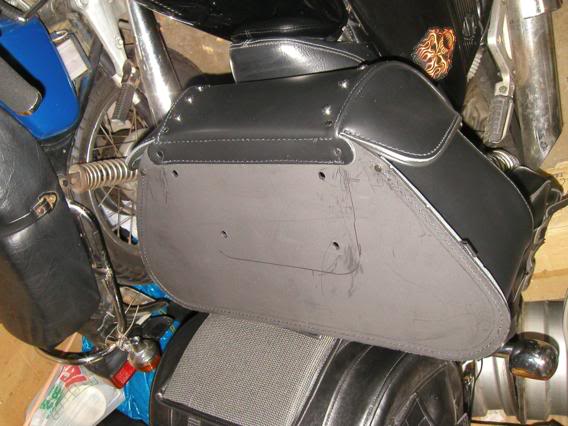
well, that's it for the moment...next mod will be easybracket installation with a set of auburn leathers lone star studded bags...can't wait!....................26....................i got the bags for my birthday (thanks mum & dad!) on july 17th, and the easy brackets came in from cruiser customizing on july the 20th. since it was raining anyway, i decided to get down to work!
first things first - replacing the fender bolts

time: 10 minutes
tools needed: the instructions say 8mm wrenches. they are wrong! you need a 6mm hex key, a 12mm box wrench, a 13mm box wrench, and a torque wrench capable of measuring 12 foot pounds.
instructions: **REMOVE ONLY ONE FENDER BOLT AT A TIME**. as you can see above, i started with the front right fender bolt. the front fender bolts have nuts on the fender bracket that are welded in place - simply use the 6mm hex key to remove the bolt by threading it out. you will then replace it with the longer bolt supplied with the easy brackets. the photo below shows the size comparison - the left hand bolt is stock, the right hand bolt is supplied. the ratchet is shown for scale.
you will need to install the new bolt through the chrome docking post. the shorter post goes at the front of the fender rail (closest to the saddle), and the longer post goes at the rear of the fender rail.
put the new bolt through the appropriate docking post, then through the fender. the front bolts will need to be threaded into the welded nut, just so a bit of thread sticks out inside the fender. now, put the supplied nylock nut on the inside of the front bolt, and use the 13mm box wrench to hold it in place while you use the 6mm hex key or ratchet to tighten the bolt down. note: if you have lowered (mine is dropped 2"), there will be very little space to get your hand between the fender and the tire! this is why i recommend threading the nut on the back of the bolt prior to tightening the bolt down - this means you do not need to try to swing the box wrench in the limited space between the fender and the rear tire.

once you have it all together, torque the bolt down to 12 foot pounds, then repeat the process for the rear bolt on the right side. 2 important notes: do not even loosen more than 1 (one) fender bolt at a time. just trust me. if you do, i am not responsible for you getting pissed off and taking a sledgehammer to your ride (it's not on my list of required tools, right?). also: the rear fender bolts have loose nuts on the inside of the fender, instead of welded nuts like the front bolts. you will need to use a 12mm box wrench to remove these, but a 13mm wrench to install the nylock nuts supplied with the easybrackets.

above you see the docking posts on the right side of the bike fully installed.
and this is the bracket hanging from the docking posts.
'round about this time, tanker decided to come outside and see how i was coming along. i was just starting on the rear left side docking post.

and this is the view of the left side docking posts, as seen from above. since they're all installed now, it's time to drill some holes in order to get the brackets on the bags!
time: 10 minutes
tools needed: 3/8" drill bit, 3/16" drill bit, power drill, sharpie or other mark-making device.
instructions: hang the easybrackets on the docking posts, on the bike. hold the bag against the bracket, adjusting position until you like how they sit note: make sure there is ample material on all sides of the holes that will be required to mount the brackets. adjust position if neccessary. now use your sharpie or other mark-making device to trace the brackets, as best as you can, on the back of the bags. once you're done, lay the bags down, then place the bracket in the outline you've made. use your marker to trace the 4 holes in the bracket onto the back of the bag. now use a 3/16" drill bit and power drill to make a pilot hole, and then drill the hole out to 3/8" to fit the supplied button-head bolts.
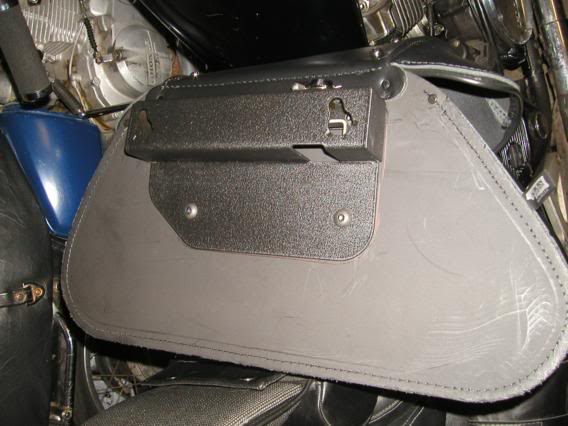
now we need to install the brackets on the bags using the supplied hardware.
time: 15 minutes
tools needed: 5.5mm hex key with T-handle, 14mm socket and ratchet, supplied hardware.
instructions: push the button head bolts through the holes in the easybrackets, then through the bag's back. place a washer on the inside of the bolt, then thread on the nylock nut. use the hex key and the socket to tighten the nuts securely onto the bolts, and you're done! note: it is not possible to reach the hex head on the bolts inside the easybracket top rail with the short end of a standard hex key. since using the long end does not allow you to apply much torque to the bolt, i would recommend purchasing either T-handled hex keys, or a system like the one shown below with a universal T-handle.
(the above photo also shows other neccessary tools - a stereo playing motorhead, and a bottle of "modding juice")

now simply unlock the tumbler on the top of the easybracket, line up with the posts, and drop the bag onto the docking posts. lock the tumbler and your bag is secure!
some people are concerned that the locking mechanism hits the back of their bags when trying to unlock - this is not an issue! the mechanism only requires 45 degrees of swing to unlock, which is possible with all bags. you may need to wiggle the key a bit, because the lock can be stiff sometimes, but it will come off!
also, i have noticed that sometimes when putting on the left bag, i have to put it on, then lift and re-position in order to get the front of the bracket to drop completely onto the docking post. i don't see it as too much of a problem though, and expect that the brackets will work in a bit.
now you see both bags installed - some people are not keen on the wide profile that the easybrackets give the bags, but i believe that the convenience is worth the extremely minimal sacrifice of aesthetics.
in this view, you can see that it really doesn't look too bad at all..
lookin' pretty sweet!
i also installed some chicago screw-backed badges that we picked up from talisman leather in london, ontario on the bag lids:
time: 10 minutes
tools: dental pick, power drill with 3/16" bit, flat bladed screwdriver, blue (medium) loctite
instructions: use the dental pick to stab through the bag from the outside, making sure you get through the plastic stiffener so you know where to drill. once the spot is marked, use the drill to make a hole from the inside to the outside. then put the backing post of the badge through the hole, and thread in the screw once you have coated it with loctite. tighten down and you're done!
the bags have been working out great! got totally soaked the day after i installed them, but not even a drop of water got inside. great gear!
Last edited by admin on Sun May 08, 2011 8:29 pm; edited 40 times in total | |
| | | | admin
The Final Say!
| | Subject: Re: * Mistress K's adventure in modifying a Suzuki Intruder C50 / C800 * Sun May 08, 2011 12:00 pm | |
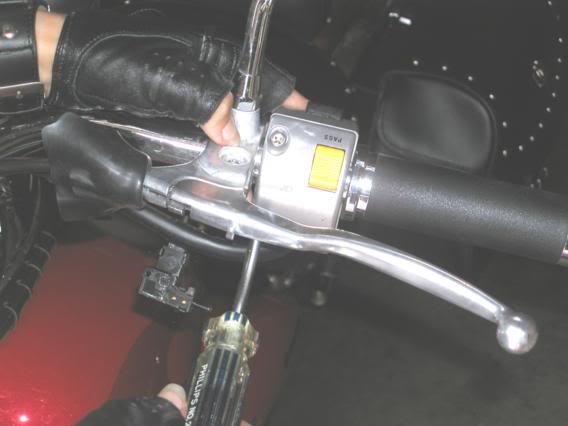
| ....................27....................so i went to one of our local bike shops with tanker on saturday, july 29th to get his new grips installed, and picked up a pair of kuryakyn wide style chrome levers to replace the stock brake and clutch levers.
the above is the stock brake lever. i decided to replace that one first, as i'd heard people had had some trouble doing the clutch lever.

time: 10 minutes
tools needed: 10mm box wrench or socket and ratchet, flat bladed screwdriver
instructions: remove the nut from the bottom of the lever assembly with the 10mm wrench. the use the screwdriver to thread the pivot bolt out of the assembly.
(sorry about the photo of my belly!)
with the bolt removed, simply pull the lever out of the assembly. the photo below shows the "naked" bar.

now place the new lever in the assembly, and drop in the bolt
now tighten the bolt with the flat bladed screwdriver

thread the nut back on and tighten with the 10mm wrench, and you're done!

now for the clutch side:

time: 12 minutes
tools needed: 10mm wrench or socket and ratchet (recommended), flat bladed screwdriver, #2 phillips screwdriver.
instructions: i did this the hard way, using a box wrench instead of a socket and ratchet. don't ask me why - it was a hot day, drank too much friday, who knows? in any case, you can't get any swing on a box wrench without removing the clutch-to-start kill switch under the assembly, so that's what i did. the photo above shows using the #2 phillips screwdriver to remove the single screw that holds the switch in place. once the screw is removed, pull in the clutch lever, and slide the switch toward the end of the bar to disengage the tiny plastic retainer. let the switch hang on its own wiring, out of the way

now use the 10mm box wrench to remove the nut on the bottom of the assembly, just like the brake side
now remove the pivot bolt. what's this? you can't remove the clutch lever from the assembly because it hits the switch housing on the bar? then remove the switch housing, silly! use the phillips screwdriver to remove the two screws (one top, one bottom, on the front inside of the housing - closer to the risers).
let it hang on its own wiring as well, out of the way.
now go ahead and remove the lever. it should wiggle out fairly easily. then turn it downwards to remove the end of the clutch cable from the lever. note: save the pivot collar from the stock lever! you will need to install this in your replacement lever. also: you may find it easier to get the end of the clutch cable out of the stock lever by using a flat bladed screwdriver as a wedge, but do be careful not to damage the plastic collar on the cable end.
and here's the naked bar.
now go ahead and push the pivot collar into your new lever, then get the clutch cable end seated. once done, you can seat the lever in the assembly, and push the pivot bolt through to hold it in place.

now reinstall the switch housing on the bar. note: there is a pin inside the housing, on the side toward the risers, that must line up with a hole drilled in the stock handlebars. this prevents the housing from rotating on the bar. make sure you get it lined up properly, or the screws will not thread in! tighten the screws using the phillips screwdriver.
now thread the nut back onto the pivot bolt, and tighten using the 10mm box wrench. then pull the clutch lever in, and re-seat the retainer of the clutch-to-start kill switch in the assembly. release the clutch lever, thread the screw back into the switch, tightening it down with the phillips screwdriver, and you're done!
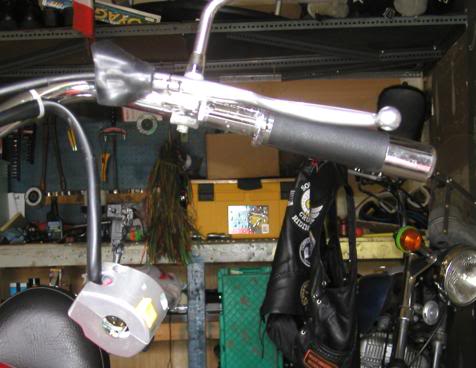
not only do these make a nice shiny addition to the front end, but they're infinitely more comfortable than the stock levers (particularly when caught at a long red light). please note, though, that they are shorter and sit further away from the grips than the stock levers! if you have small or weak hands, these may not be a good option for you. also note that you lose the adjustment on the front brake, which is slightly tighter (engages more quickly) than it was with the stock lever, and this changed the friction point of the clutch lever on my bike. i had been thinking about adjusting my clutch, since i was getting a small amount of slip between 1st and 2nd gear when upshifting (i think due to over-clutch, since my friction zone was close to the end of the lever's swing), but with the friction zone further back (about centred in the lever's swing now), she's shifting smooth as silk!....................28....................
well, the lacing for my studded leather handlebar wrap from chil howee leather (the second half of my birthday present from tanker) came in on tuesday, august 8th, so i got to work before we headed out to bike night!

naked bars, ready for wrapping!
time: 45 minutes
tools needed: you might want a pair of tweezers. i didn't use tools, though
instructions: the wrap is in three pieces (you can also order just the side pieces, if you have a riser plaque instead of just caps). i started by cutting the ends of the leather lacing to points, to make them easier to pull through the pre-cut holes. i started the lacing through the two holes at the outside of the left and right pieces (closest to the grips), straight across. then use whatever lacing pattern you choose, but don't tighten it all down as you go along or it will be difficult to get the lacing through the next set of holes. leave it loose for a couple of holes behind you (see photo below), then tighten everything down when finished and tie off however you like.

i started with the middle piece, to get a feel for how it would lace on, before moving to the much larger pieces.

this photo shows leaving yourself some slack in the lacing as you go along - the part closest to the grip is tightened, but i have lots of free play in the area i am currently working. the lacing pattern i used was to have one "dominant" lace that was always laced through the next set of holes first, and always going from outside to inside on the wrap. inside to outside would probably be easier to lace, but who ever said i do things the easy way?
i did the left side first, because the master cylinder kinda gets in the way on the right, and i wanted to have a good feel for the lacing before i had to deal with parts running interference!
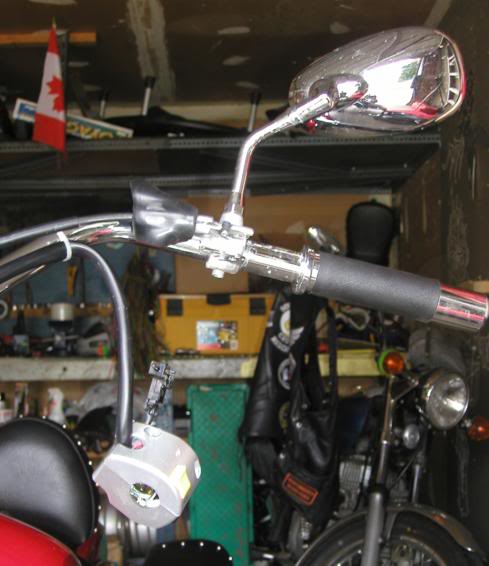
and here's my view of the finished product. i think it's the perfect accent to set off the rest of the studded leather on my bike!

doesn't look too shabby from the front, either!....................29....................
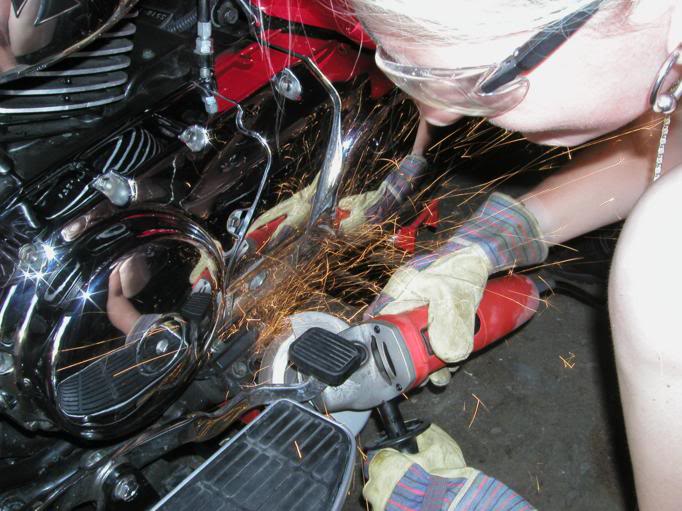
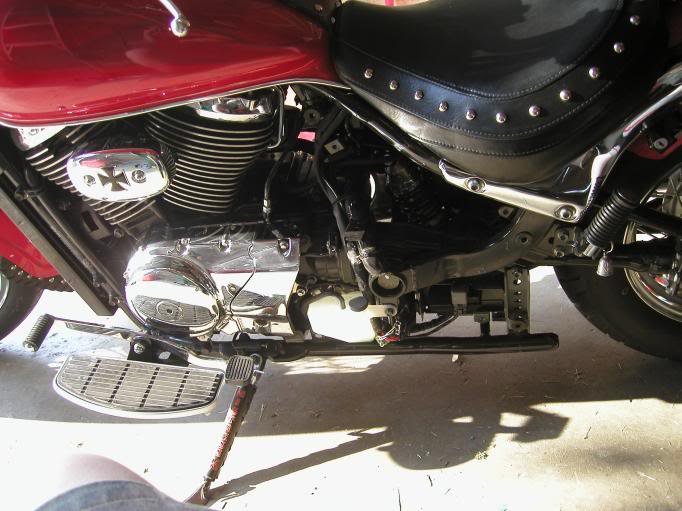
on saturday, september 23rd tanker and i were hanging out in the garage after a few hours of riding. we were listening to some tunes, having a few beers, and generally relaxing and watching the rain outside. of course, talk turned to stuff we'd like to do to our bikes, but knowing that we're pretty much broke until 2007 makes it difficult to mod. however, i suddenly had an inspiration - a no-cost mod that would make that stupid, ugly rear brake pedal on my bully look just a little sharper!

time: 15 minutes
tools needed: scissors, muffler tape, really good glue (i used household goop), a really sharp knife, a good cutting surface and a marker
instructions: first pull the rubber boot off the brake pedal as shown above. it's glued on there, so it might take a bit of tugging, but it'll come off by hand.
this is the back of the removed boot - you can see the edge wraps around the pedal on all sides.
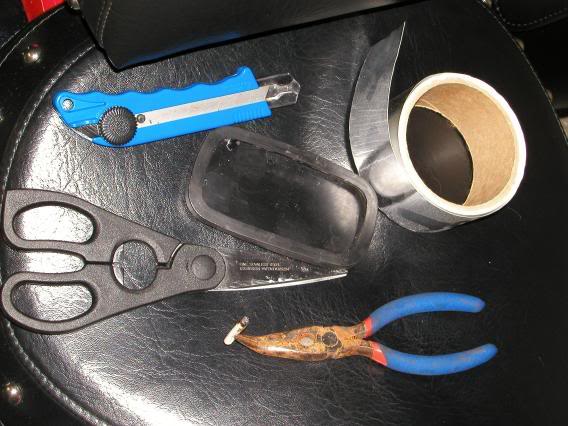
here are all the tools i used, except for the tube of glue. yes, i used ALL of these during this mod, but you can exclude the bottom one if you want

i tried polishing the brake pedal to make it shine, using both metal polish and steel wool. no dice - it still looked pretty dull. so, i used an old el-cheapo trick, and covered the section that will be exposed with muffler tape! it ain't chrome, but it's much shinier than the pedal itself!
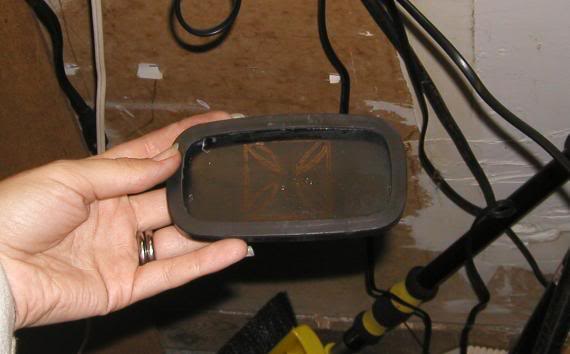
then i drew the outline of the design i wanted on the back of the pedal boot and cut it out with a really sharp exacto knife (box cutter). the raised lines on the front side of the boot are quite thick, so you will need to cut through really deeply in order to get the excess rubber out. also be careful to leave a little bit of rubber still attached for any pieces that are to remain!
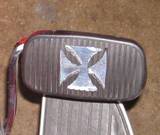
once you've cut out your design, spread glue inside the edge flaps of the boot, and on the back of the face so you will get good adhesion to the pedal. also make sure that any small pieces of rubber (like the pieces in the corners of my cross) get glued individually after you have stretched the boot back over the pedal. you don't want to either lose these pieces, or have your foot slip at a crucial moment! also be sure to let the glue set for several hours before you ride the bike again.

definitely an improvement over that plain black rubber pedal cover!....................30....................
i didn't like the way the swingarm covers make a black space towards the rear of the bike, so i decided it was time to customize them. december 16th, 2006, i finally got after it!

time: 45 mins
tools required: dremel or other cutting tool, tape, marker, an idea of the design you'd like to have on the covers, some backing material, paper to make a template, sandpaper, glue to attach backing material DO NOT USE 3M emblem adhesive! it will melt the plastic!
instructions: first of all, find a design you'd like to have on the covers

i wanted flames, so i scanned a pair of leather gauntlets that have a nice lick of flame and printed out the scan at the size i wanted. then i cut out the flame from the paper to use as my template
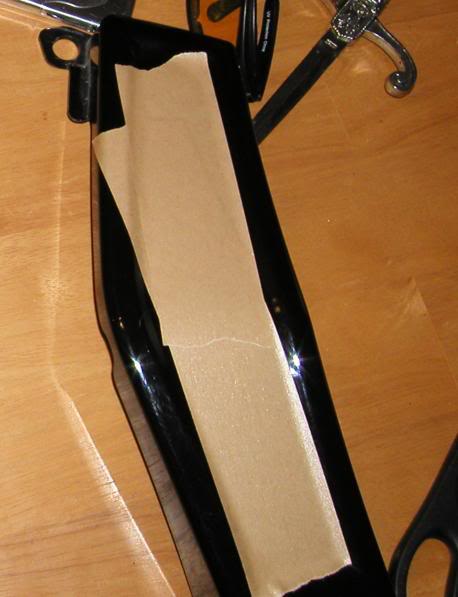
then i covered the swingarm covers in tape so i'd be less likely to crack them while cutting
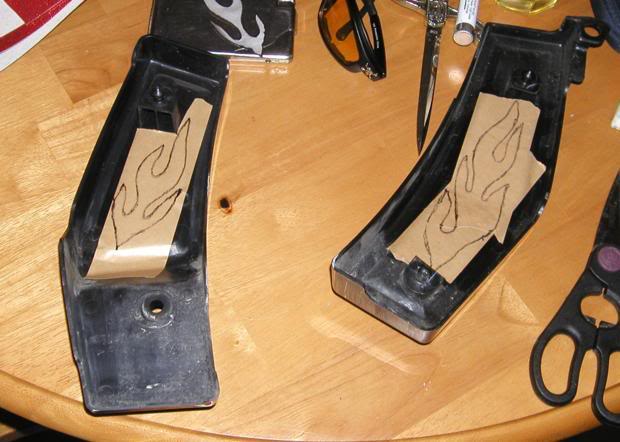
trace the template onto the tape. i did it on the inside, as i prefer to cut from the side that will be hidden.
i used the fine work attachment on a mastercraft spin saw and a drywall zip bit to do the cutting. this is not my recommended method, as the bit is bigger than i wanted (couldn't get fine points on the flames), but hell it was what i had and home depot didn't have anything i liked the look of better..
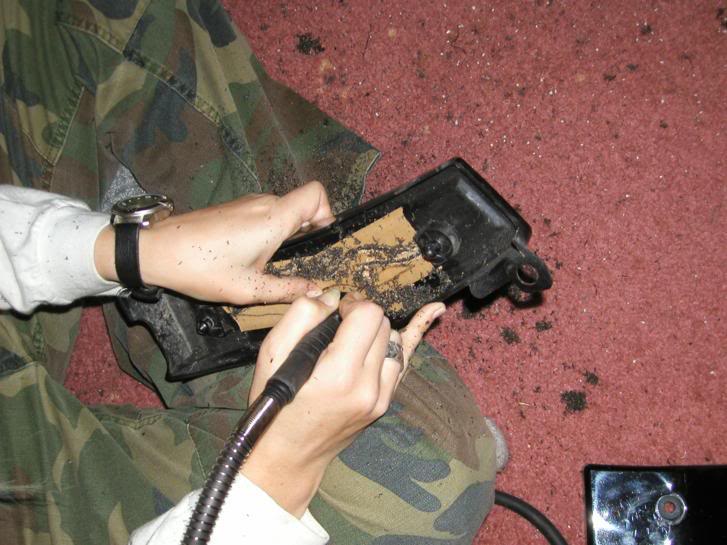
it gets pretty messy while you cut - try to clean away the shavings every inch or so to ensure you're following your template as closely as possible
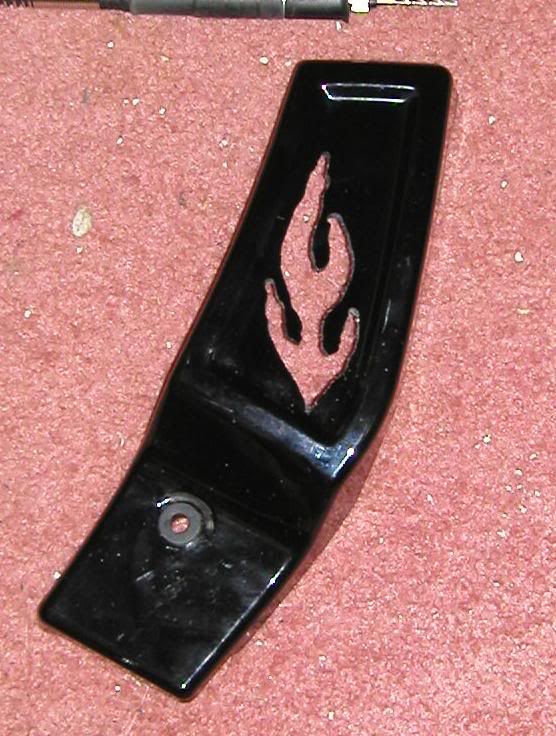
the end result here is not as nice as i had hoped, but not as bad as it could have been either!
sand the rough edges of your cut to even them out to your satisfaction, or at least until you get sick and tired of sanding them..
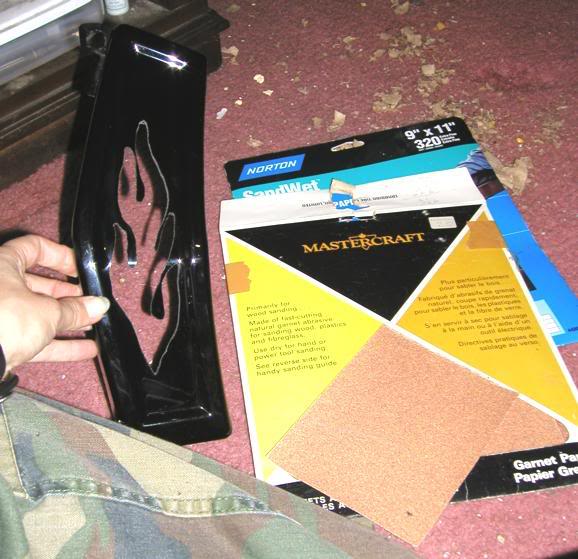
now cut your backing material (i used a type of vinyl that has a metal flake look, in a red that isn't nearly as pink as it looks in these photos) to fit, and use an adhesive to attach it to the inside of the cover. i used household goop, as it's a product i've had good experiences with.
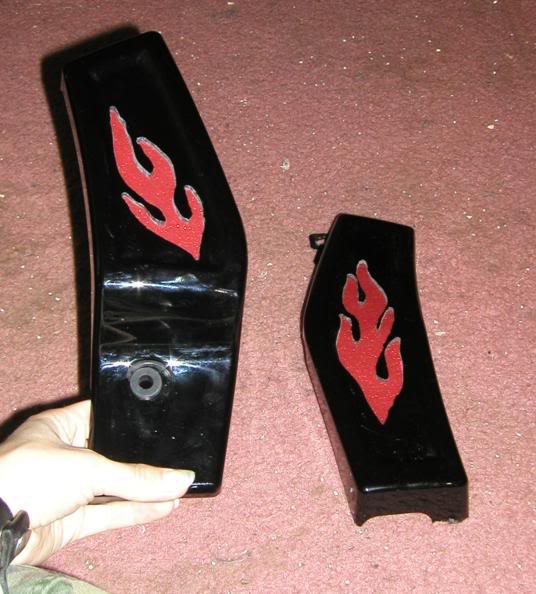
both pieces now have their backing

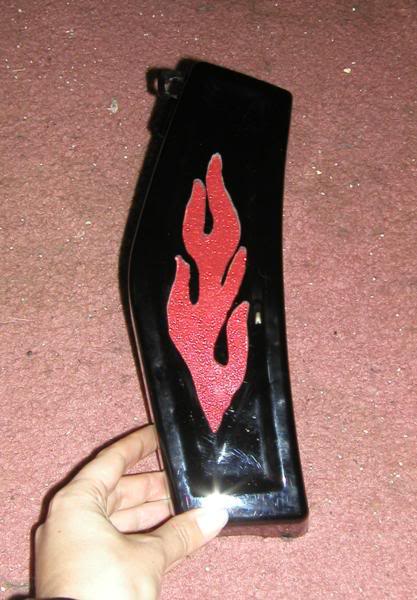
and all that's left to do is install them.
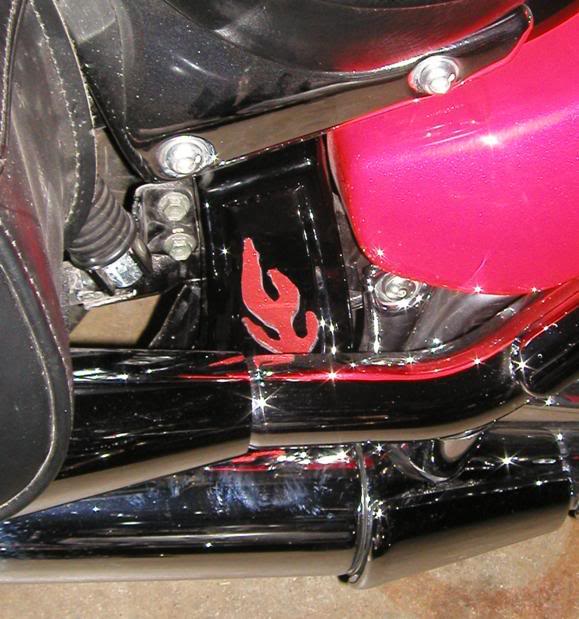
the pipe side one is mostly hidden now, but won't be once i put a pair of highway hawk turndown pipes on in the future. the flame on this one had to be smaller due to the way it mounts.

left side, straight on

left side, from slightly above. i later discovered that they do look much better from a few feet away:

though the pipe side one can be hard to see..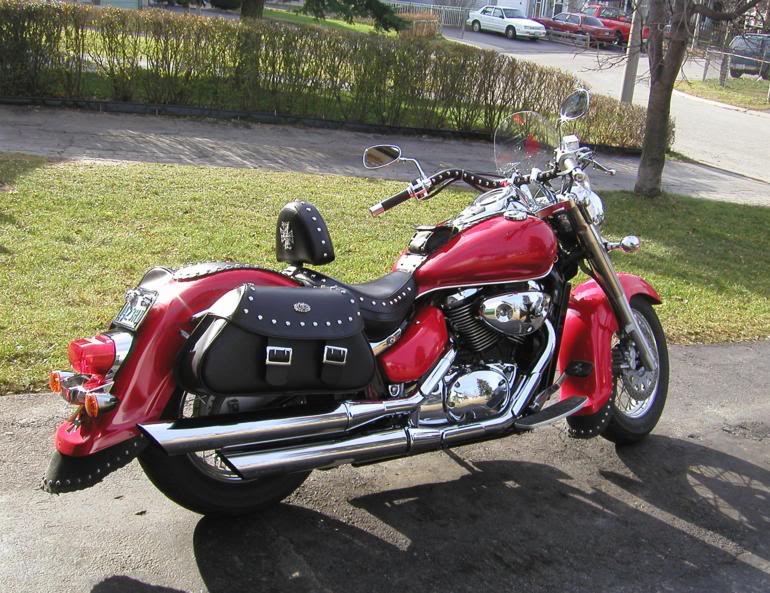 ....................31....................next up will be my iron cross flame mirrors! ....................31....................next up will be my iron cross flame mirrors!
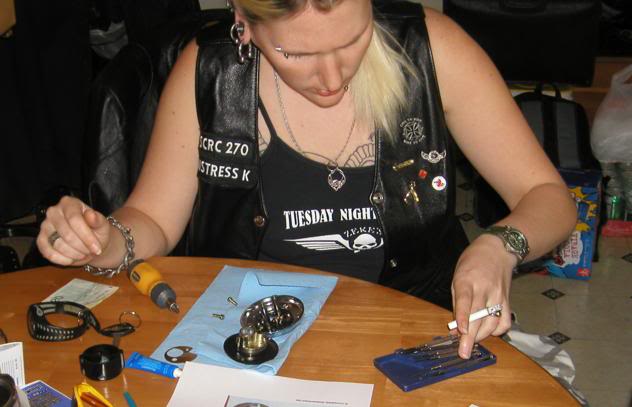
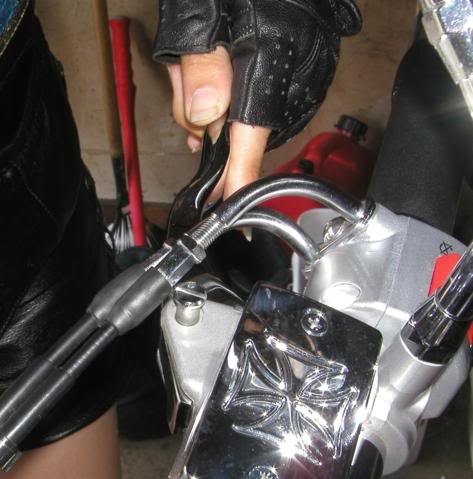
march 10th, 2007 i finally got some half-decent weather (where loctite wouldn't freeze!) to install my new mirrors, purchased on ebay for $75USD for the pair with metric adapters.

time: 30mins
tools: blue (semi-permanent) loctite, a 2.5mm allen key, a 17mm open-ended wrench, a 14mm open-ended wrench, and an 8mm open-ended wrench
instructions: in the comfort and warmth of the house, i had already assembled the mirrors by removing the 2 allen-head screws that hold tension on the mirror face, putting loctite on them, tightening them down and installing the allen-head screw that attaches the mirror head to the stem using the 2.5mm allen key. i also installed the metric adapters by applying loctite and screwing them into the mirror stems with the 8mm open-ended wrench, and spinning on the locknuts. i did this a few days ahead, so the loctite would be set by the time i went to install them.
the photo above shows loosening the locknut on the stock mirror using the 17mm open-ended wrench
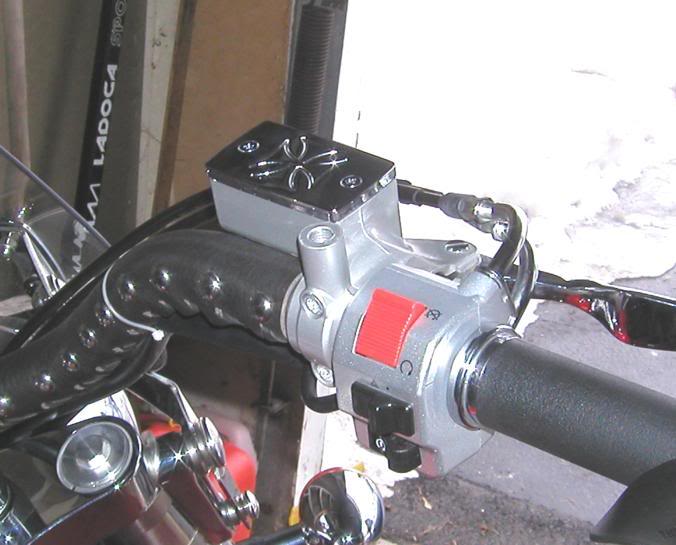
when the locknut is loose, you should be able to spin the mirrors out of their mounts with relative ease by hand. note: if you have a windshield on your bike, you will likely have to remove it in order to spin off the old mirrors and spin on the new ones.

now apply loctite to the threads of the metric adapter, and spin the new mirror into place. use the 14mm wrench to tighten down the locknut so it is tight against the mirror mount attached to the lever perch
with the mirror installed, bring the bike up to level and ensure that you are able to see behind you in the mirrors. you may have to move the stems by loosening and re-tightening the locknut, or you may be able to adjust them by moving the mirror head alone. i actually had to rotate the lever perch downward in order to get an acceptable range of vision
when adjusted properly, you should have a good view of traffic behind you in the right hand mirror, and be able to see any vehicles attempting to pass you in the left mirror. your preferences may vary.
depending on the shape, size and construction of the mirrors you choose, you may find that they limit your rear view vision, or may vibrate much more than the stock mirrors. because of the shape of my iron cross mirror heads, i actually get quite a good view (though not as good as stock), and they don't seem to vibrate any more than the original ones!
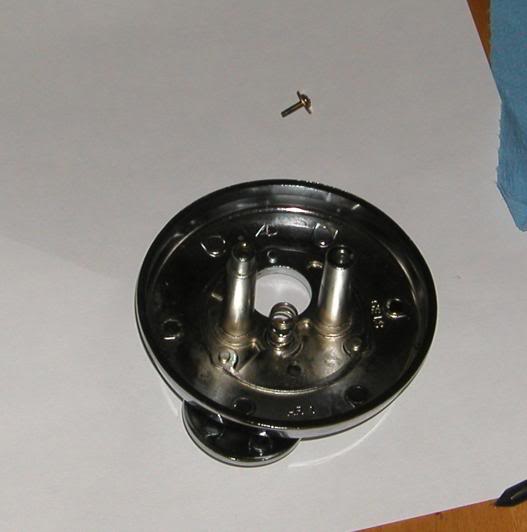
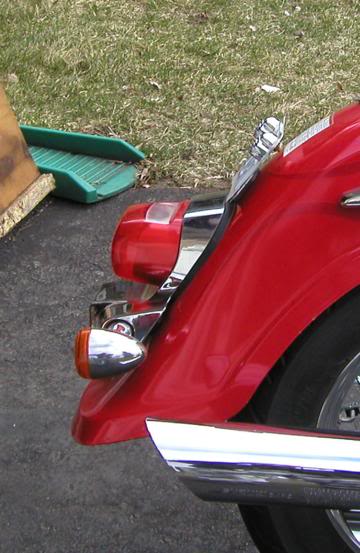
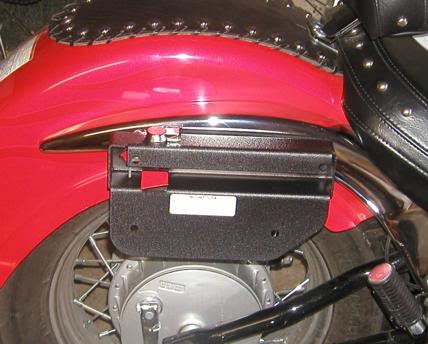
and i just love the look!....................32....................after having been on order since november 21st, 2006, my mapam side mount plate bracket finally came in at the end of march 2007. on april 14th, 2007, i started installing it to commence the cleanup on the rear fender (i didn't finish until the morning of april 15th - more about that below)
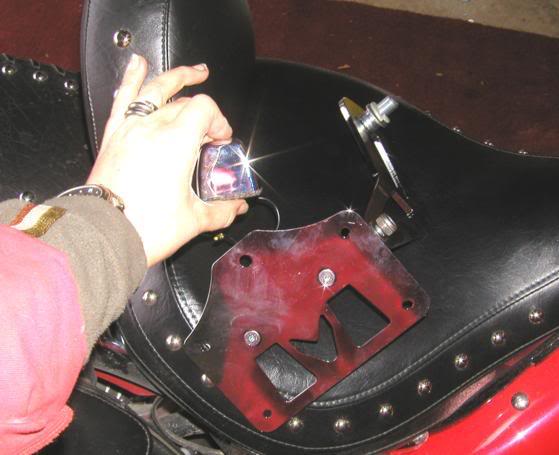
time: 1 hour
tools: all parts of plate bracket (as seen above), 14mm open-ended wrench, 10mm open-ended wrench, blue (semi-permanent) loctite, crescent wrench, large lock washer, about 3' of 16ga wire, an inline mini blade-type fuse holder with weatherproof boot, a 5amp mini blade fuse, crimp-on wire connectors, silicone sealant, zip ties, wire crimping tool
i started by bolting the light unit onto the top of the plate backing. the provided rubber washer goes between the light unit and the plate back, with the supplied flat washer between the bolt head and the plate bracket. ensuring that the wire for the light is pulled through the hollow bolt, tighten down using the 14mm open-ended wrench.

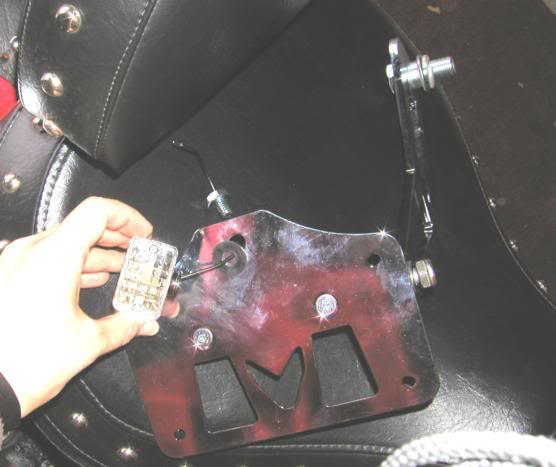
next i wired in my inline fuse holder under the saddle. the photo above shows my first attempt at wiring, where the fuse holder is connected to the bloody ground wire that goes to the taillight assembly. with the help of some volusiariders.com members, i finally put it together that i needed to tap into the brown wire on the bike side of that big white connector to get a 12v constant supply. we live and learn, don't we? but the setup looks essentially the same: brown wire to inline fuse holder, which connects to a piece of 16ga wire that runs down between the battery box and the rear fender rail to the final drive unit, then connects to the single wire on the light. this buggerup was why i didn't get finished until the next morning - i'd already replaced the drive chain on our cb400 and fully installed the bracket, but the light didn't work. i was tired and frustrated, and the temperature outside was dropping like a stone, so i decided i'd get more info and go at it fresh the next day

with the wire in place, i removed my saddlebag and used a 10mm open-ended wrench to attach my road krome plate frame and license plate to the plate backing with my faithful old skull krommets, and then used the 14mm open-ended wrench to attach the plate backing to the arm that attaches to the final drive unit. this assumes that the plate has already been removed from the bike.
i then mounted the whole bracket to the final drive unit where the big ugly black bolt that held the fake swingarm on goes. because i have removed the fake swingarm, the supplied bolt is slightly longer than i needed, and i couldn't get it tight enough that the bracket wouldn't move. so, i use a large (approx. 3/4" inside diameter) lock washer, which i figured would not only take up the space but also provide some security to prevent the bracket from moving.

i had to measure carefully to position the arm just right - i need clearance between the light and my saddlebags, as the fender and final drive unit move independently when the suspension is compressed, but also needed more clearance between the ground and the outside bottom corner of the plate frame than there is between the feeler nuts under the floorboards and the ground (to make sure i wouldn't grind off a corner of my plate frame when making a hard left turn). when i had it positioned to my satisfaction, i applied loctite to the threads of the bolt, installed the supplied flat washer against the final drive unit, then put on the supplied spacer, the bracket arm, then the lock washer and bolt. i tightened it down as much as possible - even got tanker to crank on it for extra snugness - with the crescent wrench. i simply don't have any other wrenches that would accomodate the >1" bolt!
with the bracket fully installed, i could now cut my 16ga wire to the correct length to attach to the single wire on the light. i cut off the pre-installed bullet connector and used a tube-type crimp on connector which i had been told was heat shrinkable, but didn't turn out to be. once the connector was crimped on, and i discovered it wouldn't heat shrink, i used a dab of clear silicone sealant at each end to prevent moisture and grime from getting inside. i also zip tied the wiring to the bracket arm in 2 places, then placed another zip tie where the frame meets the final drive unit, and one more under the fender rail. i left some slack in the wire, so that movement of the swingarm won't put tension on it that could snap the wire or break a connection.
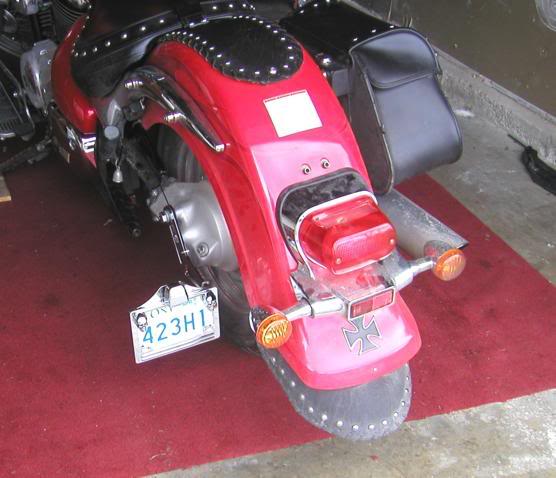
then i set to work with a credit card, some wd40 and some goo-gone to remove that damn warning sticker on the rear fender!
i'm pretty pleased with the results, and have sucessfully test-ridden with the bracket on. the light works (now that i've got it hooked into the right wire with no interruptions, and i haven't grounded out the plate frame yet. i know it looks kinda dumb with the collars for the stock license plate mount still in place, but i will have to remove the rear fender soon anyway to install my iron cross taillight once i get my turn signals, so i'll take them out then.
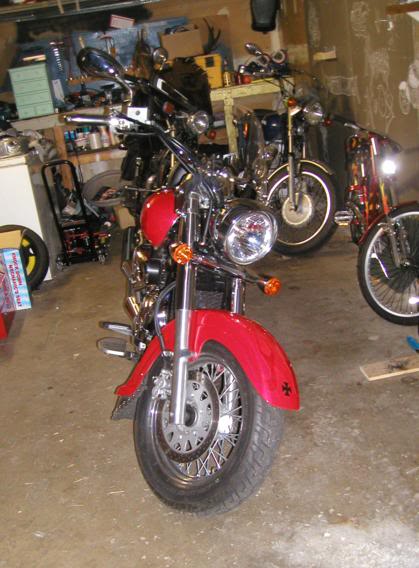
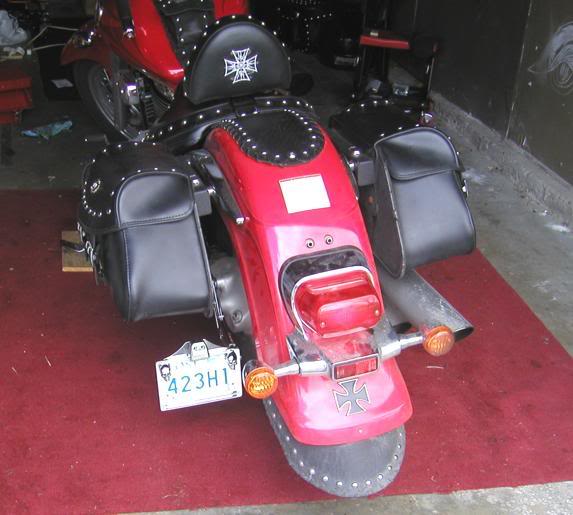
(finally got a photo of the whole bike on april 17th, 2007 - doesn't look too shabby!)cheers!
Mistress K | |
| | | | captain crash
Mentally Deficient lunatic ..... & ..... Site Moderator
| | Subject: Re: * Mistress K's adventure in modifying a Suzuki Intruder C50 / C800 * Sun May 08, 2011 5:15 pm | |
|  What an absolutely fantastic writeup, the detail she has gone into making everything she has done to her ride is brilliant. gotta say thanks to mistress k for allowing this site to host her project and to The Intruder for taking the time to transfer all the info   ps I will really enjoy going through all her mods (bit by bit), great looking bike and a lovelly looking girl to tell us how to do stuff  | |
| | | | Mr Intruder
Suzuki800.com Founder ... & ... Senior Administrator

| | Subject: Re: * Mistress K's adventure in modifying a Suzuki Intruder C50 / C800 * Sun May 08, 2011 6:27 pm | |
| Couldn't agree more Crash, its a little gold mine of information To be honest I would have to think twice about doing a transfer like that again, from start to finish it took me 10hrs to get everything to the point that its at now  glad I did though its a real asset to the site. | |
| | | | captain crash
Mentally Deficient lunatic ..... & ..... Site Moderator
| | Subject: Re: * Mistress K's adventure in modifying a Suzuki Intruder C50 / C800 * Mon May 09, 2011 8:51 pm | |
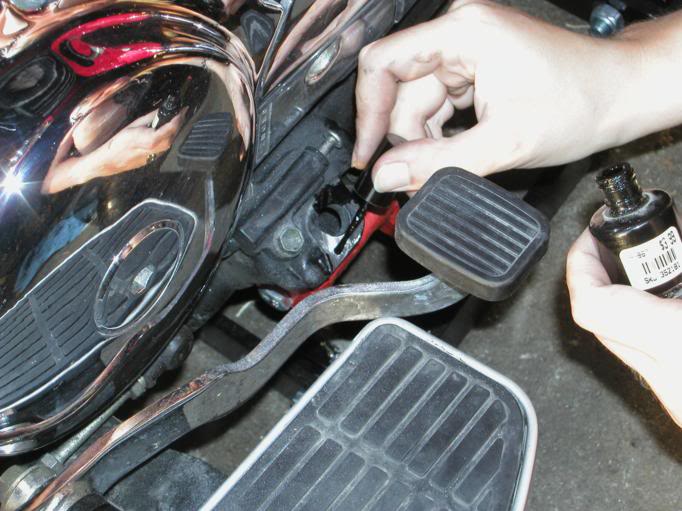
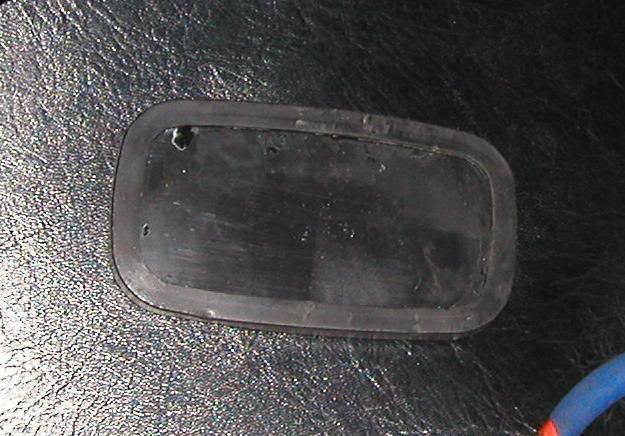
| I'm getting some ace ideas from this thead, I have got a great little "live to ride, ride to live badge that I might stick on the brake peddle with the brake rubber cut to fit around it.
I dis think about loss of grip on the peddle but its small enougth that I think it would look good but not loose to much grip. | |
| | | | captain crash
Mentally Deficient lunatic ..... & ..... Site Moderator
| | Subject: Re: * Mistress K's adventure in modifying a Suzuki Intruder C50 / C800 * Mon May 09, 2011 9:08 pm | |
| BLOODY HELL, HAVE YOU SEEN HOW MANY HITS THIS THREAD HAS HAD IN 24HRS | |
| | | | togatony
Prospect

| | Subject: Re: * Mistress K's adventure in modifying a Suzuki Intruder C50 / C800 * Fri Jul 22, 2011 4:17 am | |
| I don't know if I missed it in your write up but can you tell me what kind and where you got your windshield from? | |
| | | | Mr Intruder
Suzuki800.com Founder ... & ... Senior Administrator
| | Subject: Re: * Mistress K's adventure in modifying a Suzuki Intruder C50 / C800 * Fri Jul 22, 2011 7:46 pm | |
| You are right K didn't put the make of it in her writeup so I will email her and see if she can remember the make/model and possibly where she got it from. | |
| | | | captain crash
Mentally Deficient lunatic ..... & ..... Site Moderator
| | Subject: Re: * Mistress K's adventure in modifying a Suzuki Intruder C50 / C800 * Fri Jul 22, 2011 8:16 pm | |
| Wow yeah I never noticed that before, excellent looking screen  | |
| | | | togatony
Prospect
| | Subject: Re: * Mistress K's adventure in modifying a Suzuki Intruder C50 / C800 * Sat Jul 23, 2011 5:24 am | |
| Thanks!!! I am really interested in getting one like it! | |
| | | | Badger
Valued Member
| | Subject: Re: * Mistress K's adventure in modifying a Suzuki Intruder C50 / C800 * Sat Jul 23, 2011 11:27 am | |
| I remember reading this a while back ... Mistress K is a legend.
Thank you Mr Intruder, for your efforts with this. You da man. .. 8) | |
| | | | Mr Intruder
Suzuki800.com Founder ... & ... Senior Administrator
| | Subject: Re: * Mistress K's adventure in modifying a Suzuki Intruder C50 / C800 * Sat Jul 23, 2011 4:28 pm | |
| no worries  | |
| | | | captain crash
Mentally Deficient lunatic ..... & ..... Site Moderator
| | Subject: Re: * Mistress K's adventure in modifying a Suzuki Intruder C50 / C800 * Mon Aug 01, 2011 9:44 pm | |
| Just read the whole thread again from start to finish, the flippin detail and effort that Mistress K went to with her photo's and write up is a credit to her. I agree with what the Badger says, Mistress K your a legend  | |
| | | | Mr Intruder
Suzuki800.com Founder ... & ... Senior Administrator
| | Subject: Re: * Mistress K's adventure in modifying a Suzuki Intruder C50 / C800 * Sat Aug 06, 2011 7:09 pm | |
| - togatony wrote:
- I don't know if I missed it in your write up but can you tell me what kind and where you got your windshield from?
switchblade-deflector-windshield  | |
| | | | alfie92
Very Valued VIP Member
| | Subject: Re: * Mistress K's adventure in modifying a Suzuki Intruder C50 / C800 * Sun Aug 07, 2011 9:28 pm | |
| That sure was an interesting read,well done to Mistress K for the opportunity of seeing her work,and also Mr Intruder for taking the time to arrange it on the site. | |
| | | | captain crash
Mentally Deficient lunatic ..... & ..... Site Moderator
| | Subject: Mistress K, what a star she is Sun Mar 17, 2013 9:52 pm | |
| Just been looking at the Mistress K threads they have had absolutely thousands of views
The star one of her threads is the full thread (this one) with over 3700 views. A real star of this forum. | |
| | | | bikerdave
Member

| | Subject: Re: * Mistress K's adventure in modifying a Suzuki Intruder C50 / C800 * Mon Mar 18, 2013 8:54 pm | |
| BRILLIANT. Great tips and information. learnt a lot. | |
| | | | sanos
Member

| | Subject: Re: * Mistress K's adventure in modifying a Suzuki Intruder C50 / C800 * Tue Mar 19, 2013 3:06 am | |
| I wonder how Mistress K and Tanker is doing nowadays? We hardly see them posting on the other forum anymore. She also competes in triathlon events. | |
| | | | Mr Intruder
Suzuki800.com Founder ... & ... Senior Administrator
| | Subject: Re: * Mistress K's adventure in modifying a Suzuki Intruder C50 / C800 * Tue Mar 19, 2013 3:16 am | |
| Last time she posted on a motorcycle forum was September 2011. I think the fitness thing has become a massive deal now, shame she did great write-ups. I was well chuffed when I spoke to her and she said she wanted me to take all her mods from her website. She was worried that at some point the free access site she had it all on will get shut down and all the info and effort she put into it would just disappear. | |
| | | | CanadianCruiser
Member

| | Subject: Re: * Mistress K's adventure in modifying a Suzuki Intruder C50 / C800 * Thu Dec 12, 2013 2:34 am | |
| Loving the mods you did Mistress... couldn't help but notice your in my neck of the woods also... I'm 5 min away for zdeno's.... might see you touring sometime.. :) | |
| | | | Mr Intruder
Suzuki800.com Founder ... & ... Senior Administrator
| | Subject: Re: * Mistress K's adventure in modifying a Suzuki Intruder C50 / C800 * Thu Dec 12, 2013 8:09 pm | |
| Sorry CC but Mistess K is not so much into bikes any more, well not with engines anyway. | |
| | | | captain crash
Mentally Deficient lunatic ..... & ..... Site Moderator
| | Subject: Re: * Mistress K's adventure in modifying a Suzuki Intruder C50 / C800 * Thu Dec 12, 2013 9:02 pm | |
| Yeah aint she into fitness now instead? | |
| | | | CanadianCruiser
Member
| | Subject: Re: * Mistress K's adventure in modifying a Suzuki Intruder C50 / C800 * Thu Dec 12, 2013 9:40 pm | |
| What a shame ..... Still a chance I could see her "riding" around....  Those were some serious mods... | |
| | | | Mr Intruder
Suzuki800.com Founder ... & ... Senior Administrator
| | Subject: Re: * Mistress K's adventure in modifying a Suzuki Intruder C50 / C800 * Thu Dec 12, 2013 9:43 pm | |
| She has not been spotted by me at least since June 2011 (1 month after this thread was posted), when I received an Email from K granting permission to post all her modifications and pictures because she was concerned that her free hosting web page would at some point be discontinued, which I believe has now happened. The last I new of her was that she was into push bike racing in particular & triathlons. A first class lady but not an active member so expect no replies. | |
| | | | MarcinG
Valued VIP Member

| | Subject: Re: * Mistress K's adventure in modifying a Suzuki Intruder C50 / C800 * Thu Dec 12, 2013 11:14 pm | |
| Old write-up yet so helpful.
So many ideas squeezed into one bike.
Easy brackets...that's the kind of thing I'd want for my bags. | |
| | | | CanadianCruiser
Member
| | Subject: Re: * Mistress K's adventure in modifying a Suzuki Intruder C50 / C800 * Thu Dec 12, 2013 11:29 pm | |
| They are nice.. but my wife bought me a set of bags that unzip... so I have the yolk under the rear seat then I got Hyway hawk bag clips... they clip onto the supports holding the bags in place..LINKY | |
| | | | MarcinG
Valued VIP Member
| | Subject: Re: * Mistress K's adventure in modifying a Suzuki Intruder C50 / C800 * Thu Dec 12, 2013 11:32 pm | |
| That crap that goes over the fender is exactly what I want to get rid off :} | |
| | | | CanadianCruiser
Member
| | Subject: Re: * Mistress K's adventure in modifying a Suzuki Intruder C50 / C800 * Thu Dec 12, 2013 11:45 pm | |
| definitely agree with you there... I like the look without the rear seat... (also stops ppl from asking me for rides lol) eventually I'll probably go with the clip-ons.. but for now it's all about keeping the wife happy... specially after my last stunt (bringing the bike indoors)... still catching a little for that one... | |
| | | | Sponsored content
| | Subject: Re: * Mistress K's adventure in modifying a Suzuki Intruder C50 / C800 * | |
| |
| | | | | | * Mistress K's adventure in modifying a Suzuki Intruder C50 / C800 * | |
|
Similar topics | |
|
| | Permissions in this forum: | You cannot reply to topics in this forum
| |
| |
| |
| Slide Show | | A random selection of suzuki800.com member bikes. |
| Latest topics | » Hello All,
by Badger Yesterday at 10:56 pm
» G’day
by Badger Yesterday at 2:37 pm
» Hi all
by Badger Yesterday at 2:33 pm
» just saying hello to this site
by sgtruth60@gmail.com Tue May 07, 2024 8:04 pm
» Newbie
by M800chimp Tue May 07, 2024 11:28 am
» 12inch apes
by Mbroom21 Tue Apr 16, 2024 12:54 pm
» Aye what's happenin'?
by 717RedRumBob Fri Apr 12, 2024 6:50 am
» Handle bars rotation for comfort
by Badger Thu Apr 11, 2024 1:20 pm
» Hello!
by GregWidger Mon Apr 01, 2024 9:16 pm
» Hey to all
by alongfortheride Tue Mar 26, 2024 9:41 pm
» Just saying hello as asked... plus a question.
by SAM11206 Wed Mar 20, 2024 6:34 pm
» Hello!
by Onigatudor Wed Mar 20, 2024 2:39 pm
» Choke plunger
by flying1 Wed Mar 13, 2024 4:43 pm
» Hello intruder people
by nano Tue Mar 05, 2024 2:19 pm
» Hi from North east England
by Brianhuck Sat Mar 02, 2024 7:30 pm
» VX800 - Wiring issue colours & diagram?
by Billybop90 Fri Mar 01, 2024 12:44 am
» Looking for a set of Leg wind deflectors for a C50 Boulivard.
by Aikido789 Sat Feb 24, 2024 10:11 am
» Saying hello from Cheshire
by bernard chaddock Wed Feb 21, 2024 4:58 pm
» ola de portugal
by fabio almeida Tue Feb 20, 2024 9:28 am
» Hello from Texas
by icoolwecool99@gmail.com Mon Feb 19, 2024 9:47 pm
|
|
