Subject: Re: Apehanger project Sun Feb 07, 2016 6:22 pm
A suggestion for you John. When you think you have bled the air out of the system finally leave the top off the master cylinder with the lever taped to the throttle assembly & leave it overnight so that any possible small bubbles of air still in the fluid or in the pipe will rise under there own steam to the top & because the valve in the master cylinder is open it will just float up & pop like a soap bubble. In the morning look to see if the level of fluid has dropped & top up if needed? Just a suggestion....
Bluesman Very Valued VIP Member
Subject: Re: Apehanger project Sun Feb 07, 2016 6:42 pm
Thanks Peter, I'll try that one! Suggestions from those who have been there before are the best kind.
peardrop3 Very Valued VIP Member
Subject: Re: Apehanger project Sun Feb 07, 2016 7:36 pm
Just ensure that the M/cylinder is level though John. do you have the bike on a stand or is it on the propstand? Also make sure the tank, if it's fitted has a plastic sheet over it in case you drop brake fluid on it cos it'll do it no good whatsoever!
Bluesman Very Valued VIP Member
Subject: Re: Apehanger project Sun Feb 07, 2016 7:55 pm
Peter the bike is on the side stand but the angle of the bars makes the master cylinder dead level when turned in a bit. Yep I shall be well covered up too.
alfie92 Very Valued VIP Member
Subject: Re: Apehanger project Mon Feb 08, 2016 2:49 pm
John before you ride the bike just pump the brake to make sure it is ok. You only have to do this the once. You are doing a great job, and making it easier for others members.
Bluesman Very Valued VIP Member
Subject: Re: Apehanger project Mon Feb 08, 2016 5:14 pm
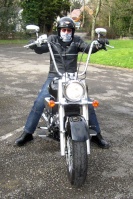
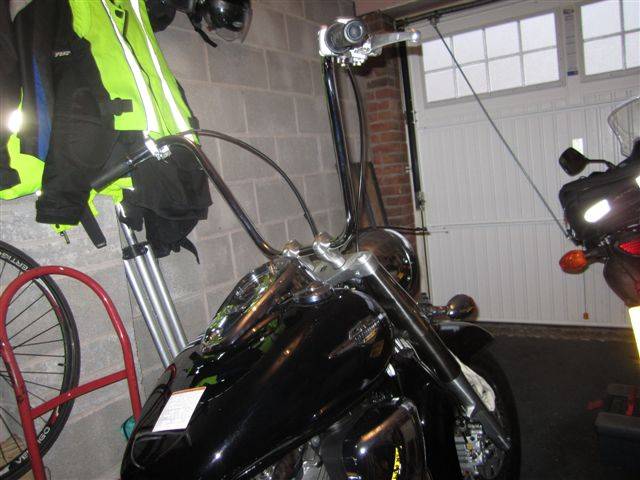
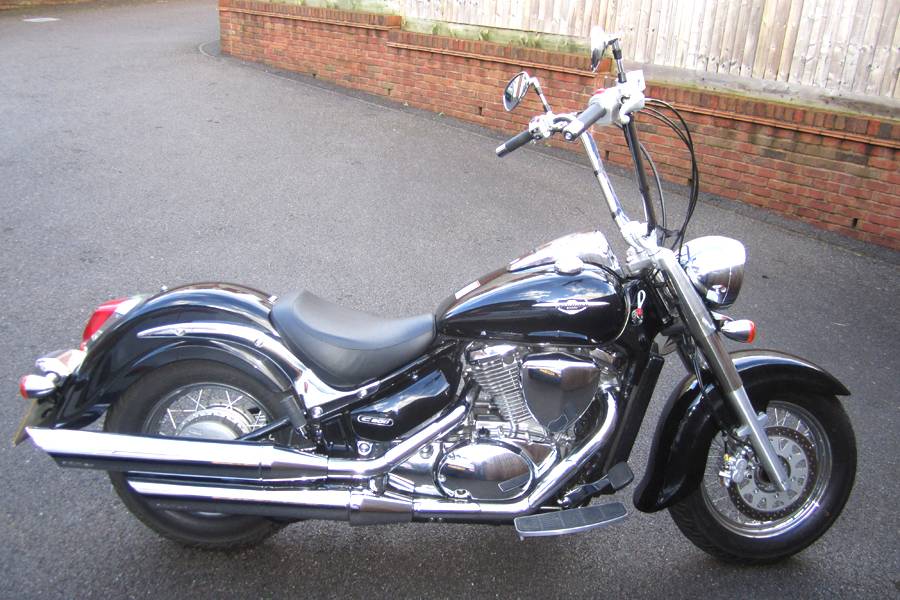
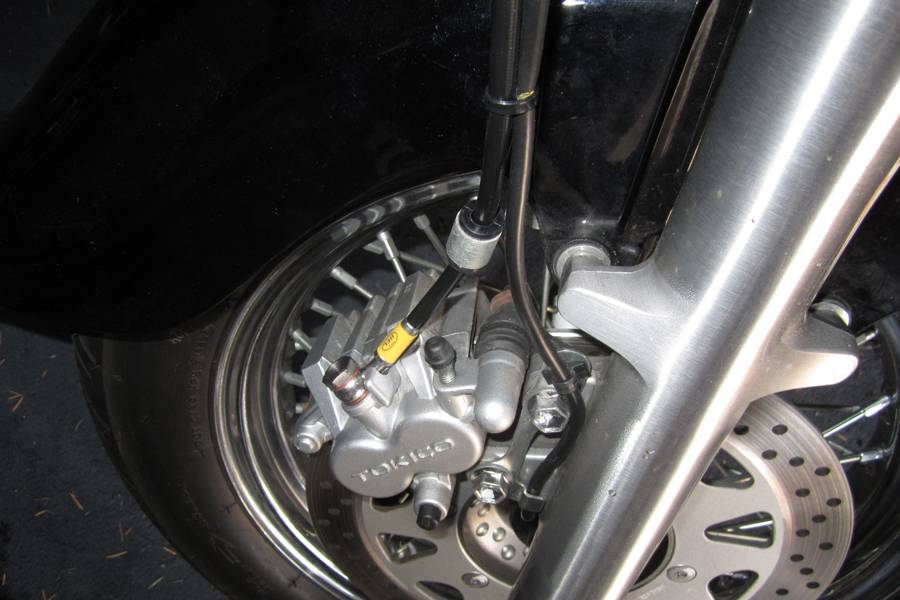
Bled brakes this morning. Took a long time but suddenly the pressure came and all the bubbles had stopped. Wheeled it and applied lever Alfie - seems to be working well. Relieved because that's my first time. Took 1 hour (including covering everything and checking all the set up about 10 times!) - not bad for a rookie! . Here she is now with working brakes and clutch:
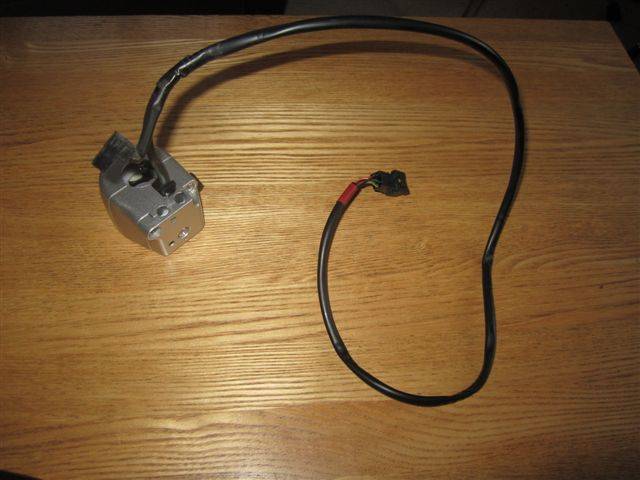
Then it was off to pick up the extended throttle cables - he had lubed them as well so that's one less job to do. Took off the right hand switch gear and disconnected throttle cable ends. I won't fit the cables yet because now I have disconnected the right hand loom and housing to take into the house:
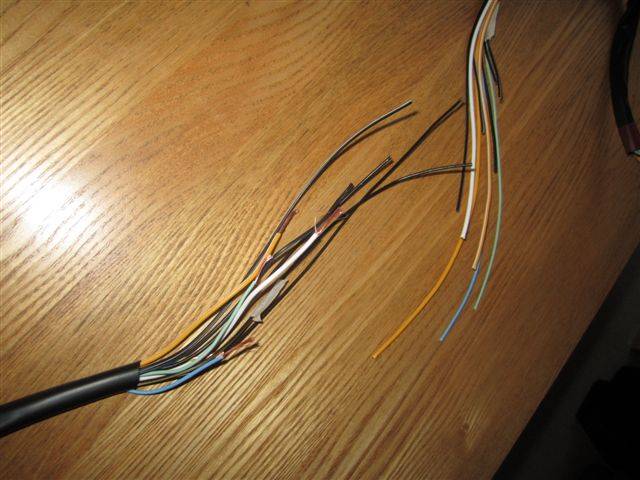
Last night I cut the 10 wires on the left loom, taping one of the two identical black/yellows not to wrongly connect (good tip Dave!). I staggered them as suggested because my soldering might be a bit bulky:
Then I prepared (Blue Peter style!) all 15 extension wires ready to be soldered on:
Here is my electrical bench in the man-cave! It's great to work in the warm with plenty of light, in comfort.
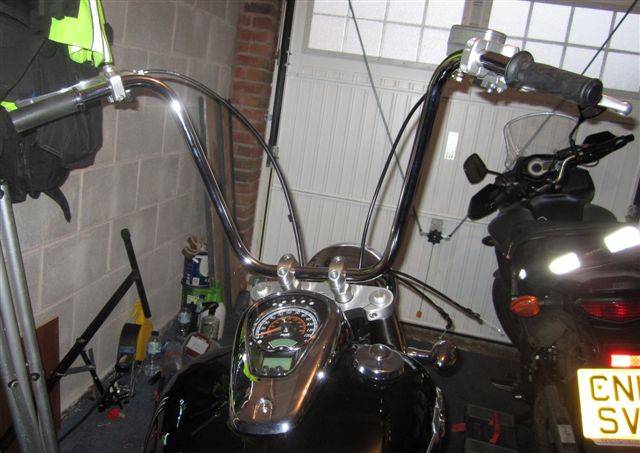
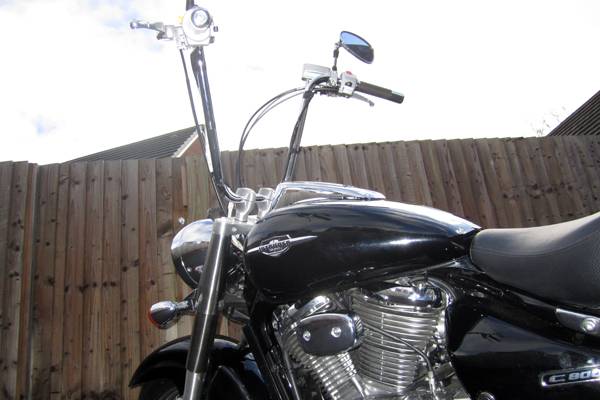
Here's a couple of shots of the bike, work in progress (temporary grip). Can't stop sitting on it cos it's soooo comfy!
Cracking on with the wiring tonight. There's a nice day forecast for Wednesday....maybe a maiden voyage...we'll see; the electrics have all got to work and I'm slightly nervous of the throttle cable install. Still none of it's rocket science so fingers crossed. So looking forward to riding my kick ass Intruder Mk2.
peardrop3 Very Valued VIP Member
Subject: Re: Apehanger project Mon Feb 08, 2016 6:16 pm
Looking good John
simbo * Site Guru *
Subject: Re: Apehanger project Mon Feb 08, 2016 9:40 pm
Coming along nicely John, you should feel proud of yourself undertaking these task
Bluesman Very Valued VIP Member
Subject: Re: Apehanger project Mon Feb 08, 2016 11:51 pm
Oh bum! Hit a snag. In staggering the wires, not enough room to fit on sufficient outer heat shrink to cover all the new wiring. Dave's method of cutting in one place would have been better in this respect. I have done it in two pieces but now have to decide whether to tape the gaps or cut the outer shrink and tape the whole length. Anyway the right hand loom is done. Pity about the break; makes it slightly weaker unless anyone can think of a nifty heat shrink patch trick? I have not applied any heat to the outer shrink yet.will probably have the same situation on the other loom with the 10 wires - I have cut that but not soldered yet. One thing I am not going to do is cut the wires again (straight) cos it all took bloody ages! Anyway at least one side is nearly done. Should have listened to Dave - if it ain't broken don't fix it!
PS Just had a thought, I wonder if you can slice heat shrink lengthways and then fix around wiring and apply heat. I wonder if it would pull in either as a patch or longer?
Subject: Re: Apehanger project Tue Feb 09, 2016 6:58 am
Non you can't slice heat shrink length ways. John if you can't sort it then maybe tape it and buy some thin spiral wrap, just a thought.
katsd Very Valued VIP Member
Subject: Re: Apehanger project Tue Feb 09, 2016 8:09 am
Self Amalgamating Tape - not as good as heat-shrink, but will cover all the splices together
Bluesman Very Valued VIP Member
Subject: Re: Apehanger project Tue Feb 09, 2016 8:49 am
katsd wrote:
Self Amalgamating Tape - not as good as heat-shrink, but will cover all the splices together
That looks the ticket - how does it stick? I did find this morning that if you slit one end of the heat seal joint a bit, slip it inside the other and apply heat it joins almost seemlesly and strong.The tape looks good though Dave R - need to get some of that.
katsd Very Valued VIP Member
Subject: Re: Apehanger project Tue Feb 09, 2016 2:47 pm
Sticks to itself
peardrop3 Very Valued VIP Member
Subject: Re: Apehanger project Tue Feb 09, 2016 3:19 pm
As both Dave's said, spiral wrap or tape or both even?
simbo * Site Guru *
Subject: Re: Apehanger project Tue Feb 09, 2016 4:25 pm
Bluesman wrote:
Oh bum! Hit a snag. In staggering the wires, not enough room to fit on sufficient outer heat shrink to cover all the new wiring.
Take the plug of the end and slide sufficient over to cover the gap, they come off with a pin, just make sure you take a photo or note which wire goes in which slot
Bluesman Very Valued VIP Member
Subject: Re: Apehanger project Tue Feb 09, 2016 7:06 pm
Thanks for wiring tips. I'm slightly concerned the outer heat shield might make the cable a bit stiff particularly where it goes into the headlamp and winds. Might do some tape some shrink - we'll see. I'm not going to finish the cable sheath until after I have made sure everything is working on the bike - quite happy to do final heat shrinking/taping on the bike. It's the soldering and inner heat shrinking that takes time and I've been happy to do off the bike. Well, today I fitted the new throttle cables - bit of a full time job this project (forgot what it's like!). Took me a long time to fit the cables at both ends but now I have a nicely smooth throttle action with just the right amount of play in the grip. Tonight I will crack on with the left loom and hopefully tomorrow get the electrics connected......then, see if the bike works! I got all the bar/lever/ mirror angles right today so we are not far away from the long awaited maiden voyage - fingers crossed!
simbo * Site Guru *
Subject: Re: Apehanger project Tue Feb 09, 2016 8:34 pm
Bluesman wrote:
Thanks for wiring tips. I'm slightly concerned the outer heat shield might make the cable a bit stiff particularly where it goes into the headlamp and winds.
Don't shrink it tight, leave the outer one a bit loose, the inner ones will look after the connections. Are you finding the seating position more comfortable than with stock bars?
Bluesman Very Valued VIP Member
Subject: Re: Apehanger project Wed Feb 10, 2016 12:36 am
Sim the whole riding position is different. It might take a while to adjust the bar rake to suit me. Just sitting in the garage feels very comfortable. I like the high hands a lot. Time will tell! I've just finished the 10 cable left loom - knackered! Had to leave the outer heat shrink off - would not have been able to see the colours at both ends. Never mind - I've got some of that self amalgamating tape coming to Screwfix tomorrow. Once I see it's all working, I might bind both sides. I liked your idea of taking the pins out of the connector but I'm not brave enough to do that! The irony is, once the looms are unwound from inside the headlight , there may have been enough cable from stock! Arrrghhhh! Never mind, the main thing now is a finished result!
Bluesman Very Valued VIP Member
Subject: Re: Apehanger project Wed Feb 10, 2016 12:15 pm
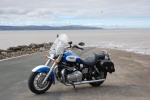
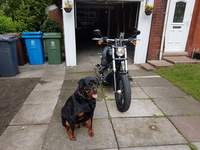
Success! Fitted the electrics today. Switched on and everything came to life (phew!) Rushed in to put on the gear cos the sun came out too (rare!) and took her for a spin. Bars felt good. Had to tweak the mirrors at an angle. Brakes fine. Throttle as usual. Wooohooooo! Have only temporarily taped up the cables on the bars - off to get my new tape later to finish it properly. A few more small things to do. It's been a long haul but very pleased with the result. A lot easier to wheel when pushing too! Here are a few pics - will post more when cables finished.
Many thanks for all the help guys and to Dave (Mr.I) who set me on this trail in the first place.
Lowey Valued Member
Subject: Re: Apehanger project Wed Feb 10, 2016 12:52 pm
John, I have watched your progress on this project with great interest, although it is not my thing to have bars such as these, I have to say what an excellent job you have made of this. The result looks very impressive.
Regards Jeff.
simbo * Site Guru *
Subject: Re: Apehanger project Wed Feb 10, 2016 8:54 pm
Spot on! it looks very cool now get that bloody sticker off the tank! it's ruining the coolness
katsd Very Valued VIP Member
Subject: Re: Apehanger project Wed Feb 10, 2016 9:21 pm
Very well done John - cracking job. I'm not an "ape" guy, but I have to say, they look good. Well done with having the bottle to do it yourself - I was cacking myself when I did my flat bars, but the buzz you get when you've finished makes the stress worth while
Bluesman Very Valued VIP Member
Subject: Re: Apehanger project Wed Feb 10, 2016 10:15 pm
simbo wrote:
now get that bloody sticker off the tank! it's ruining the coolness
Yep that needs to come off and soon! Mind you I might ride pissed or without a helmet in the absence of a daily reminder!
Last edited by Bluesman on Wed Feb 10, 2016 10:57 pm; edited 1 time in total
alfie92 Very Valued VIP Member
Subject: Re: Apehanger project Wed Feb 10, 2016 10:53 pm
Well done John, you must be made up. Looking good. Certainly been a good project to follow.
Subject: Re: Apehanger project Thu Feb 11, 2016 6:42 am
Brilliant job done John. Looks like you used my mirror trick as well.
Bluesman Very Valued VIP Member
Subject: Re: Apehanger project Thu Feb 11, 2016 7:33 am
Mr Intruder wrote:
Looks like you used my mirror trick as well.
Works well. At first I could not get enough inward bend. But then I twisted the mirror on its ball down at an angle and the view I wanted appeared. I have noticed, Dave that there is a bit of flex in the bars at the bolts under the risers. They seem tightened up and of course there is a rubber washer, I presume to minimise vibration. It's probably a case of the extra leverage and just something to get used to - I don't actually think they are going anywhere. It's interesting also that one or two members have said that although they appreciate the skills involved in adding tall bars, they are not everyone's cup of tea. I am fully with this but personally I think the style fits the cruiser image well and as we have both twigged, the comfort is improved. It will be interesting what comments/looks I get over time when out and about - not that I care much as it's for me I installed apehangers! The best one so far was the guy in the parts department who ordered them for me. When they arrived, he took one look and said, 'Oh, those are too tall.' I told him they were 16" and his book had apes from 12" to 20". Too tall for what, I thought....his arse maybe?
Thanks again for your inspiration, Dave and to all forum members who have given me encouragement. There were times when I wondered what I'd got myself into!
Right, today, it's get the wires tidied up, fit the clutch lever boot and install cable ties. Then it's sit back and wait for the warmer weather so I can enjoy the bloody bike.
Subject: Re: Apehanger project Thu Feb 11, 2016 9:41 am
Glad I have been of limited help through my write up. The credit must go to you for a great job done. John I would check to see if the risers could be tightened up a little, under the yolk, you never know, worth checking.
simbo * Site Guru *
Subject: Re: Apehanger project Thu Feb 11, 2016 10:03 pm
Bluesman wrote:
I have noticed, Dave that there is a bit of flex in the bars at the bolts under the risers. They seem tightened up and of course there is a rubber washer, I presume to minimise vibration. It's probably a case of the extra leverage and just something to get used to - I don't actually think they are going anywhere.
The risers are rubber mounted top and bottom and have a rubber mounted sleeve through the top yoke too, it's to reduce vibration through the bars, the extra flex will be due to added height and leverage but nothing to worry about.
Bluesman Very Valued VIP Member
Subject: Re: Apehanger project Fri Feb 12, 2016 12:11 am
Thanks Sim, that's what I thought. I'll get a 19mm socket tomorrow just to make sure they are fairly tight. Finished the wiring routing and cable ties today so I think it's now officially finished. Cost was about £160 including everything. If I had paid to have it all done , I'm guessing another £150. The main reason I did it myself was not to have the bike sitting somewhere, maybe in, maybe not. I would have needed to get stuff for them even then. The electrics could not have had the attention to detail I was able to give. Learnt about parts of my bike I did not know before! **"Next project may be an X-Tre....I'm getting a bit tired of the rev limiter!
simbo * Site Guru *
Subject: Re: Apehanger project Fri Feb 12, 2016 7:28 pm
Bluesman wrote:
**"Next project may be an X-Tre....I'm getting a bit tired of the rev limiter!
There's a thread on a DIY one somewhere, now that your confident at soldering
Bluesman Very Valued VIP Member
Subject: Re: Apehanger project Sat Feb 13, 2016 6:51 pm
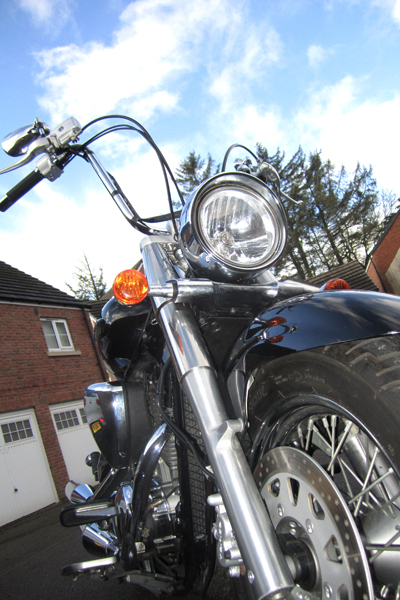
Ok, here's a final pic and video.
Cables all finished:
Went for a longer ride today. Cold but fun!. You notice the bumps more with springy bars but who cares - feels great!
Here's a video in a car park:
simbo * Site Guru *
Subject: Re: Apehanger project Sat Feb 13, 2016 7:24 pm
Totally Badass! looks good, sounds good too
johnboss Very Valued VIP Member
Subject: Re: Apehanger project Sun Feb 14, 2016 8:26 am
Never thought I was a fan of 'ape' bars, but those look really cool - and all your own work. Credit to you.
Lowey Valued Member
Subject: Re: Apehanger project Sun Feb 14, 2016 9:19 am
Very good, I'm pleased you are happy with the end result.
Bluesman Very Valued VIP Member
Subject: Re: Apehanger project Sun Feb 14, 2016 12:01 pm
Cheers guys
alfie92 Very Valued VIP Member
Subject: Re: Apehanger project Sun Feb 14, 2016 1:40 pm
Looks and sounds well John.
captain crash Mentally Deficient lunatic ..... & ..... Site Moderator
Subject: Re: Apehanger project Wed Feb 17, 2016 5:46 pm
O yeah blues that is COOL sounding mighty nice to
Ken1964 Valued Member
Subject: Re: Apehanger project Thu Feb 18, 2016 9:24 am
Looking good Sir, must be feeling good as well. Well done on what you have done, I would love to do that but probably never will.
Twojobmick Valued VIP Member
Subject: Re: Apehanger project Fri Feb 19, 2016 6:32 am
Well done John .... Don't think I would have had the bottle to mess with the wiring like that !
Bluesman Very Valued VIP Member
Subject: Re: Apehanger project Fri Feb 19, 2016 9:40 am
Twojobmick wrote:
Well done John .... Don't think I would have had the bottle to mess with the wiring like that !
Once I got everything cut - neither did I! But then it's a question of survival - you've got to do it properly to make everything work again. Actually, it's pretty straight forward stuff, just very repetitive! As long as the colour matches are checked and rechecked and the soldered joins are strong, not much can go wrong! I think my main worry was that I might not like high bars after all that effort! But I do, so phew, it was worth it!


 . Here she is now with working brakes and clutch:


 Coming along nicely John, you should feel proud of yourself undertaking these task


 There were times when I wondered what I'd got myself into!


 But then it's a question of survival - you've got to do it properly to make everything work again. Actually, it's pretty straight forward stuff, just very repetitive! As long as the colour matches are checked and rechecked and the soldered joins are strong, not much can go wrong!